

How to Create an Email Account in DirectAdmin
Learn how to create a mailbox in DirectAdmin, choose its name and password, set the quota and daily limit, and verify the result with step-by-step screenshots.
Create a mailbox on your domain in DirectAdmin and check that it appears with the correct address and limits. This tutorial walks through the procedure from the full dashboard, with overview images and close-ups of the fields.
Before you begin
Log in to DirectAdmin with your hosting username and password, using the address provided when your service was activated.
Confirm that the domain you will create the email address for is available in your account and that your plan allows you to add mailboxes.
Choose the address name and prepare a unique password for that mailbox. Have a password manager ready to save it.
Check your available hosting space and permitted limits before setting the quota and daily sending limit.
1. Check the domain and locate the email manager
On the dashboard, check the active domain in the upper-right corner, below the search bar. If you manage multiple domains, select the one that will have the new address before continuing.
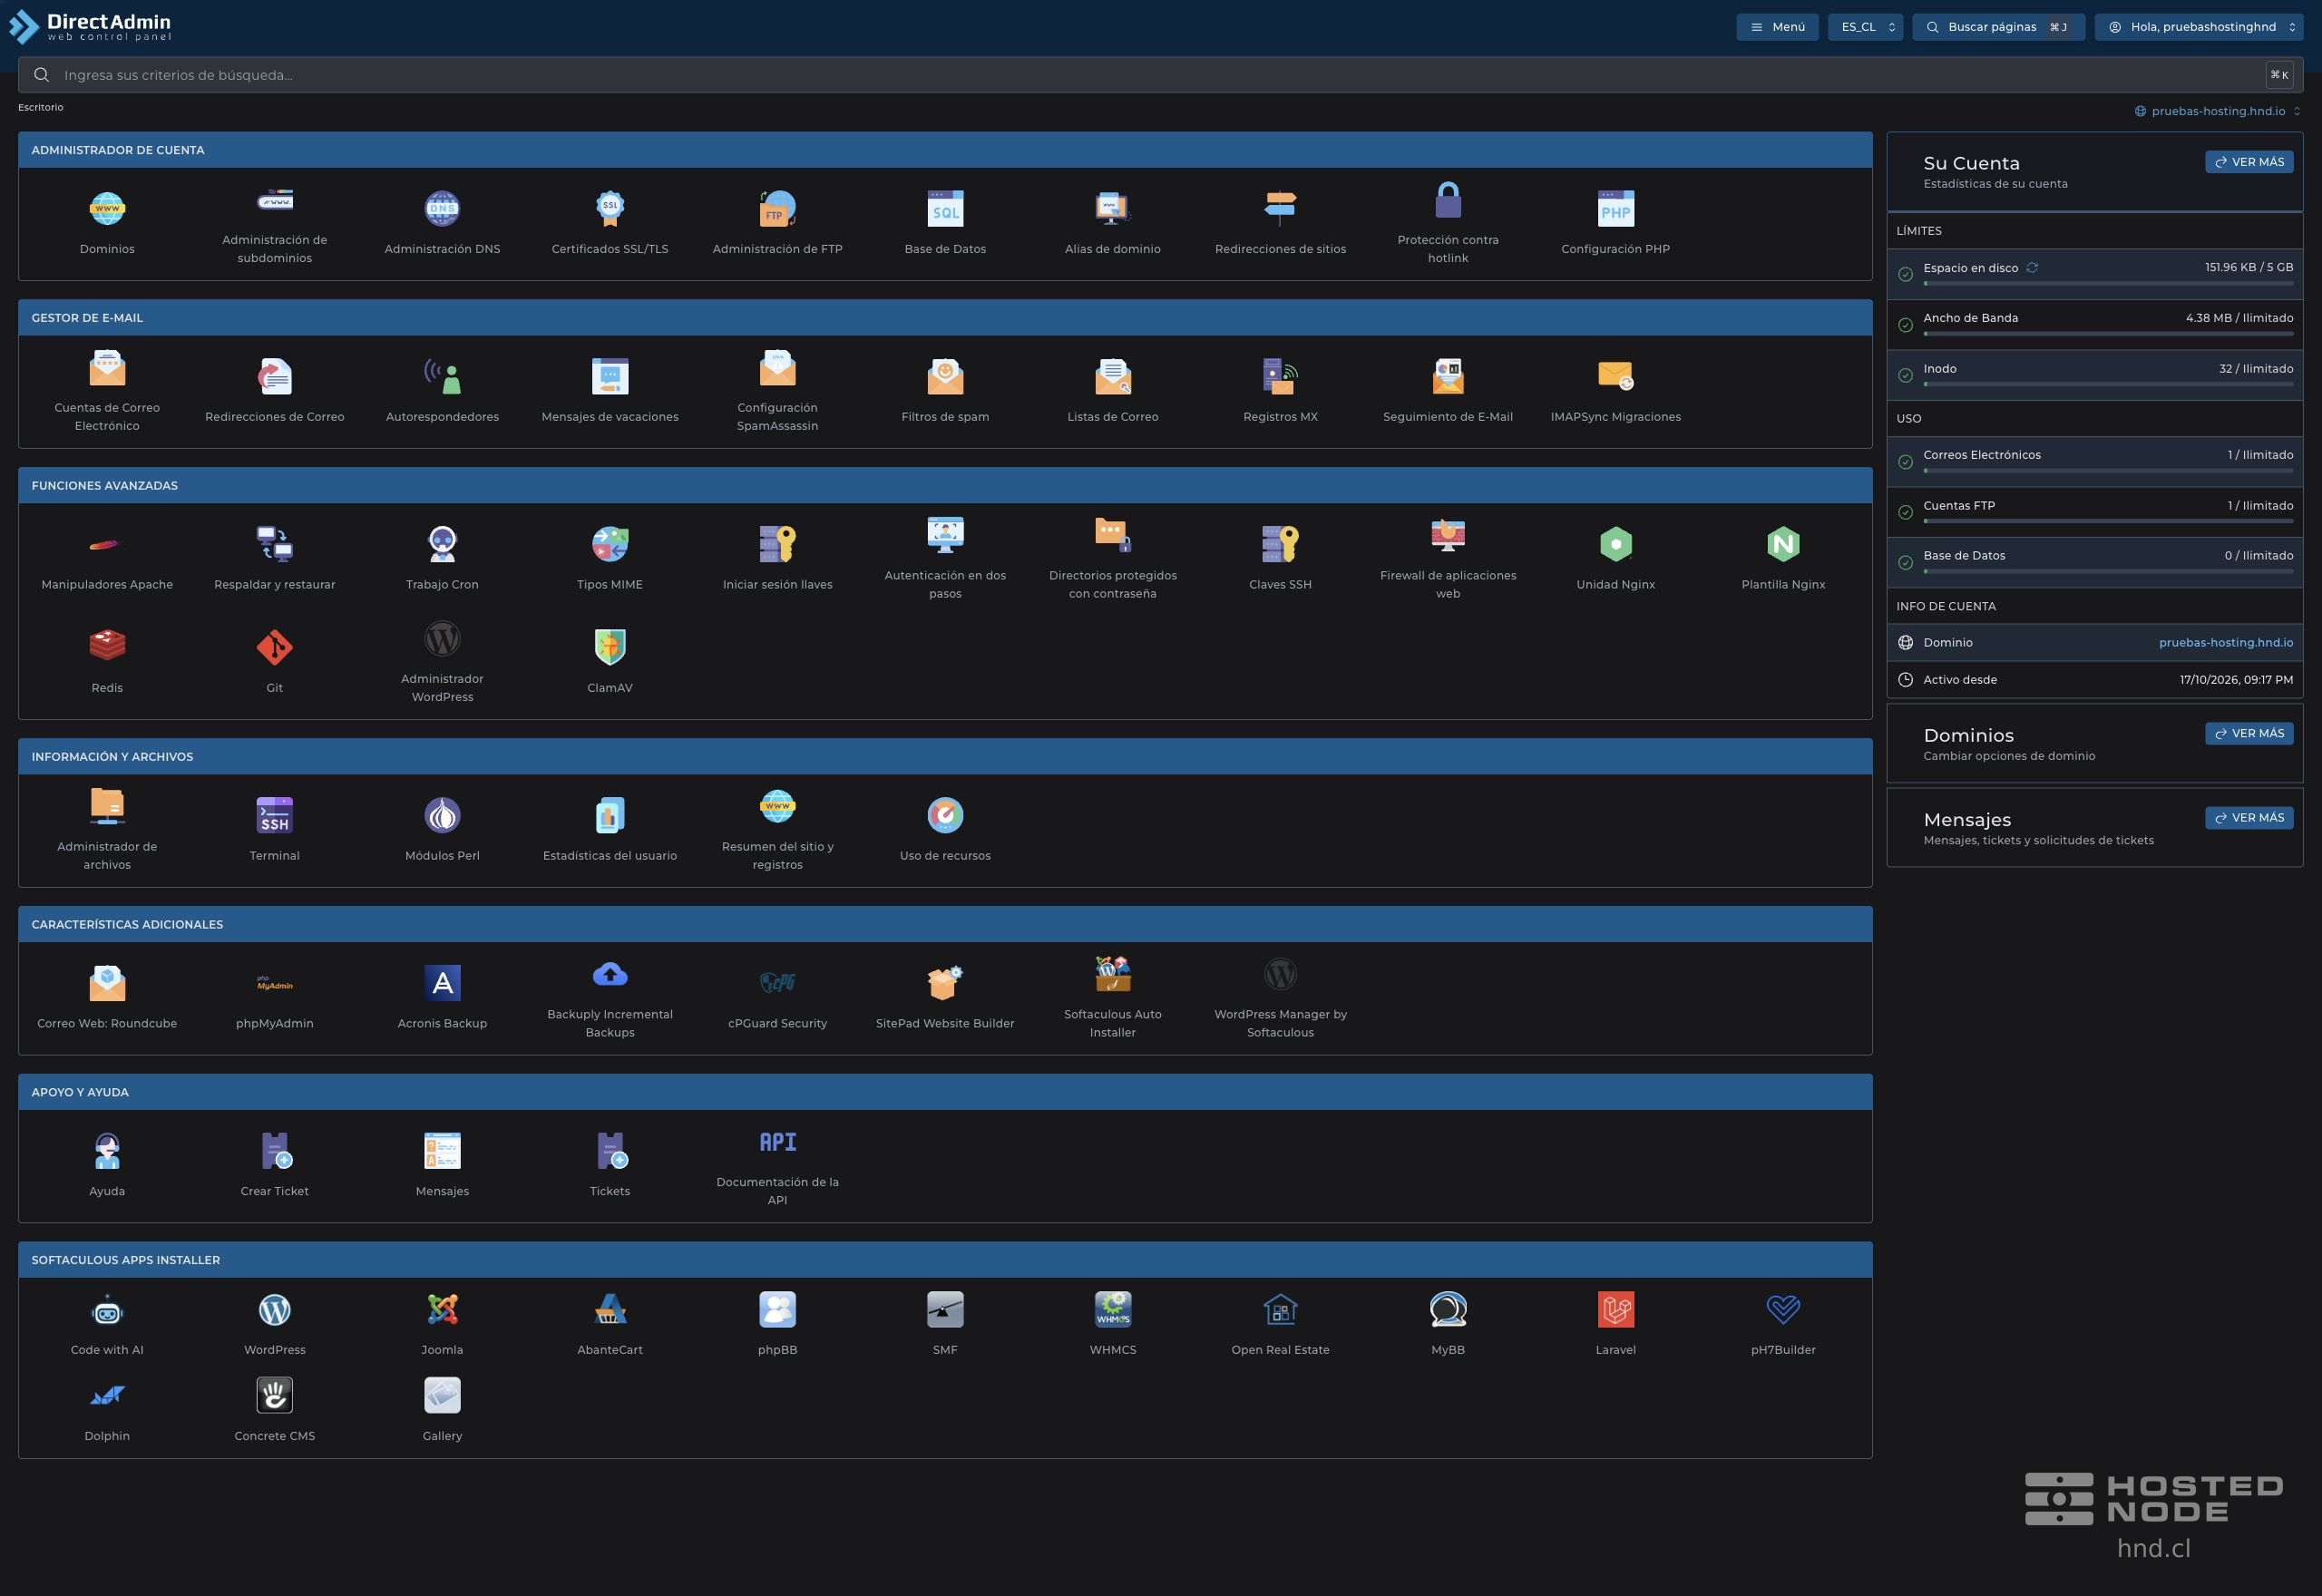
Find the E-mail Manager group and click E-mail Accounts. It is the first icon in that group in this installation.

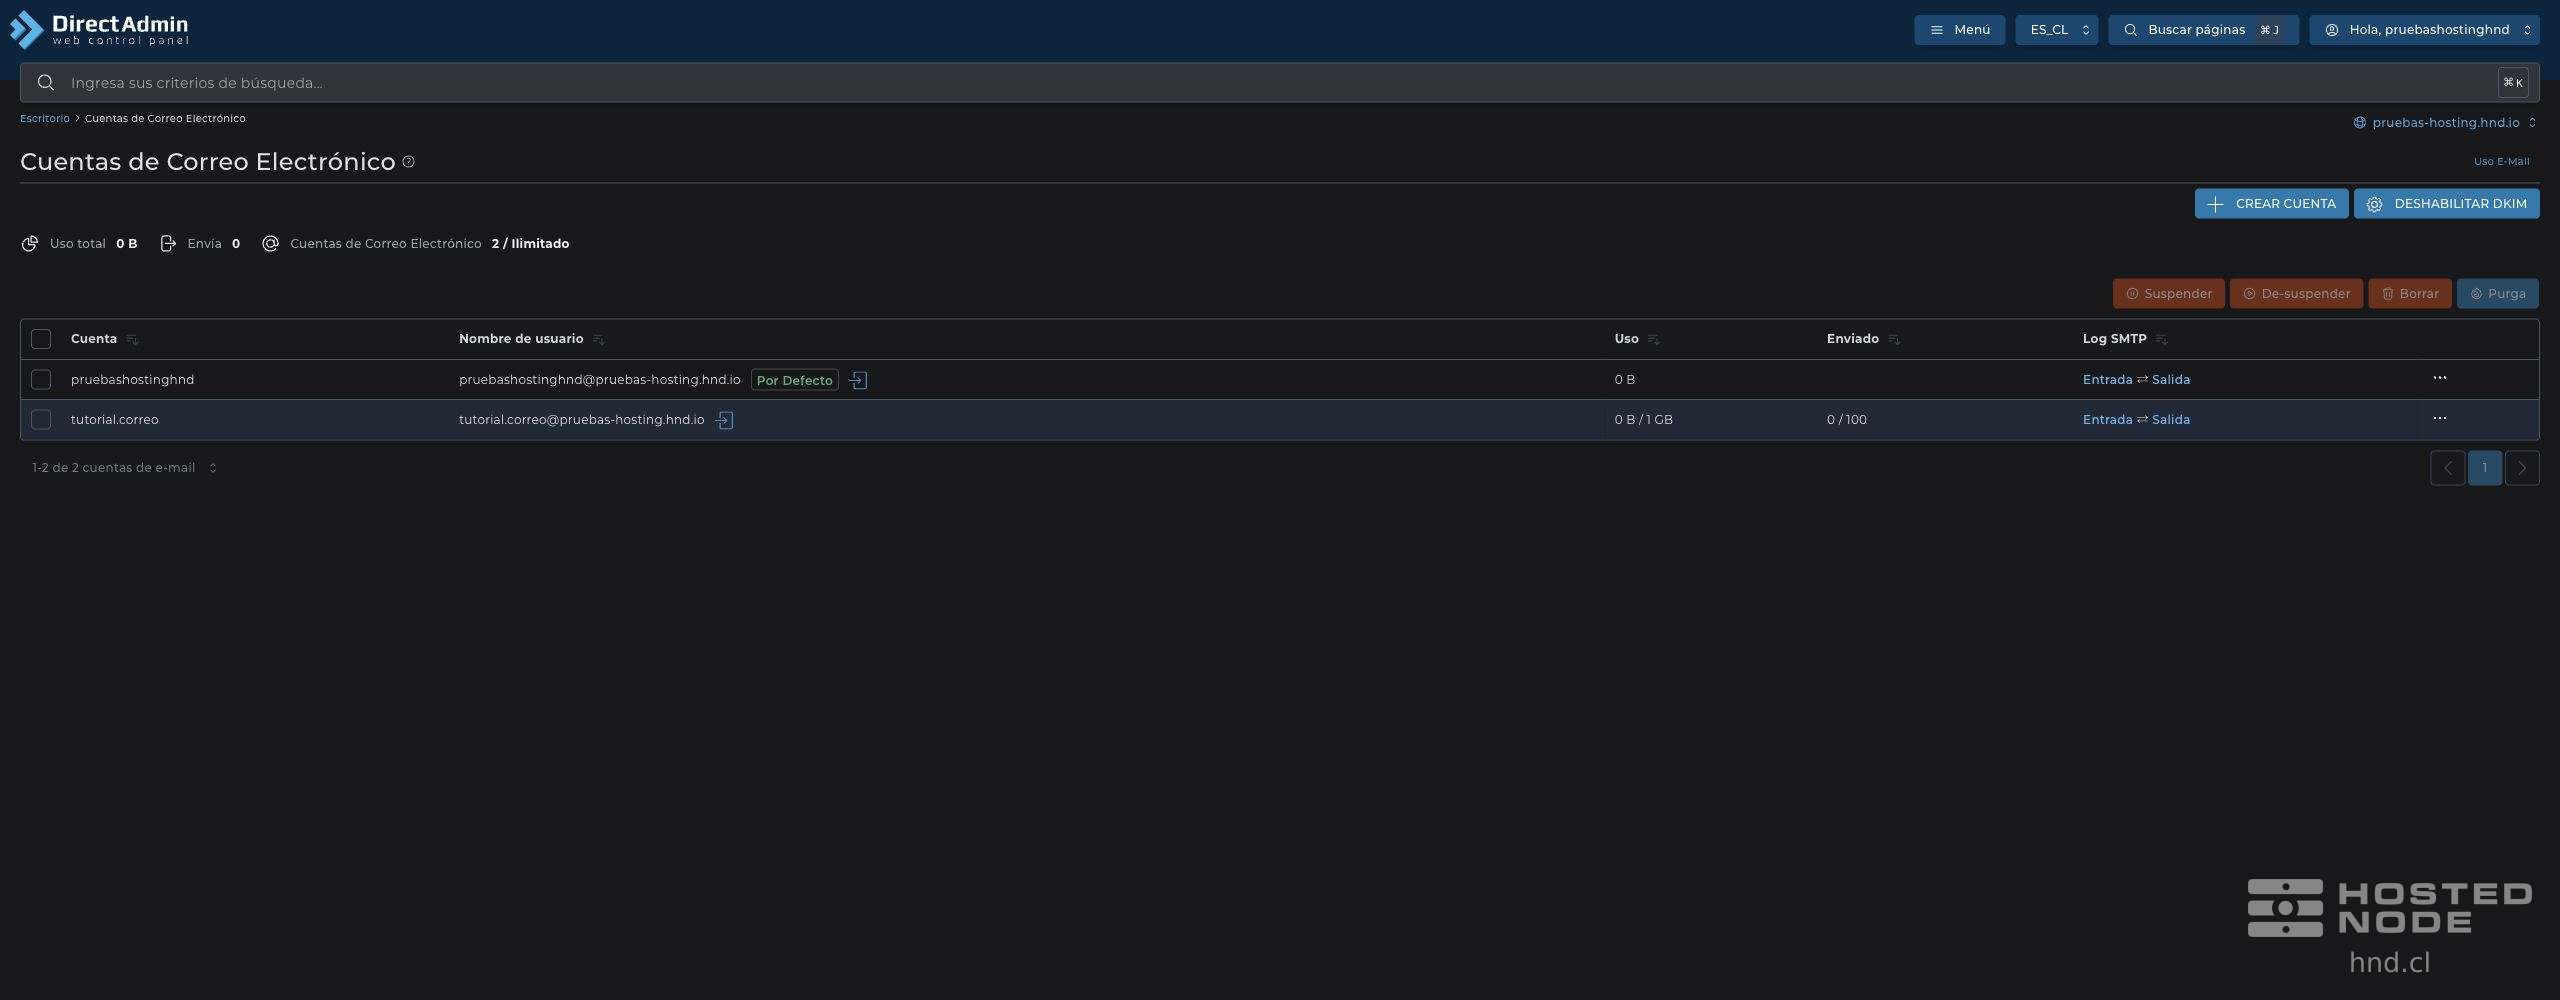
The overview screenshot retains all seven dashboard groups and the account column. The following close-ups show specific areas at native resolution for easier reading.
2. Open the Create Account form
On the E-mail Accounts page, you will see the existing mailboxes. Click Create Account at the top right.
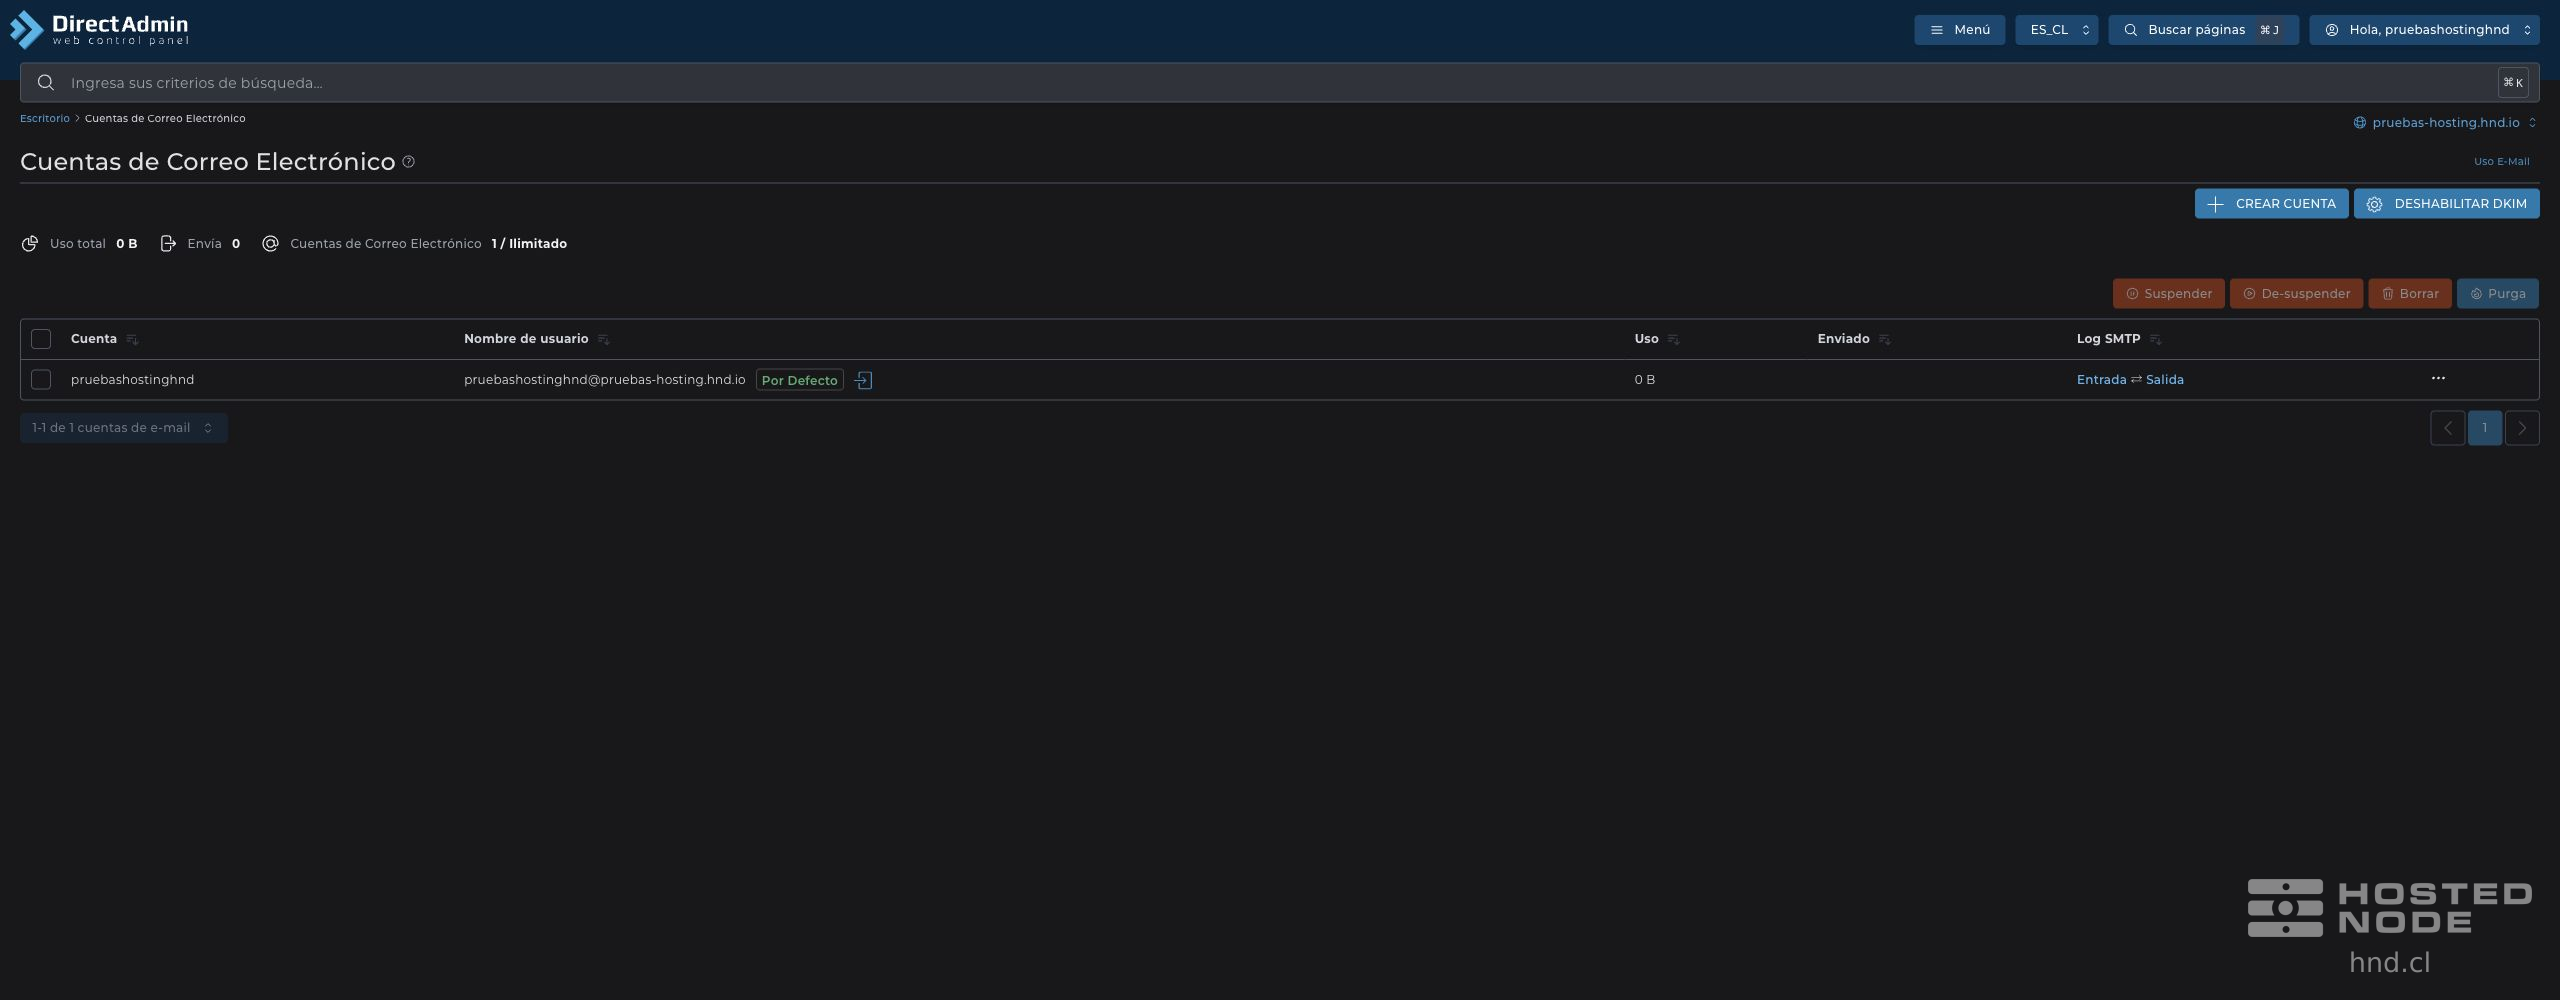
The account marked Default already existed before the demonstration. To add your new address, use Create Account and keep the existing accounts.
3. Enter the name and password
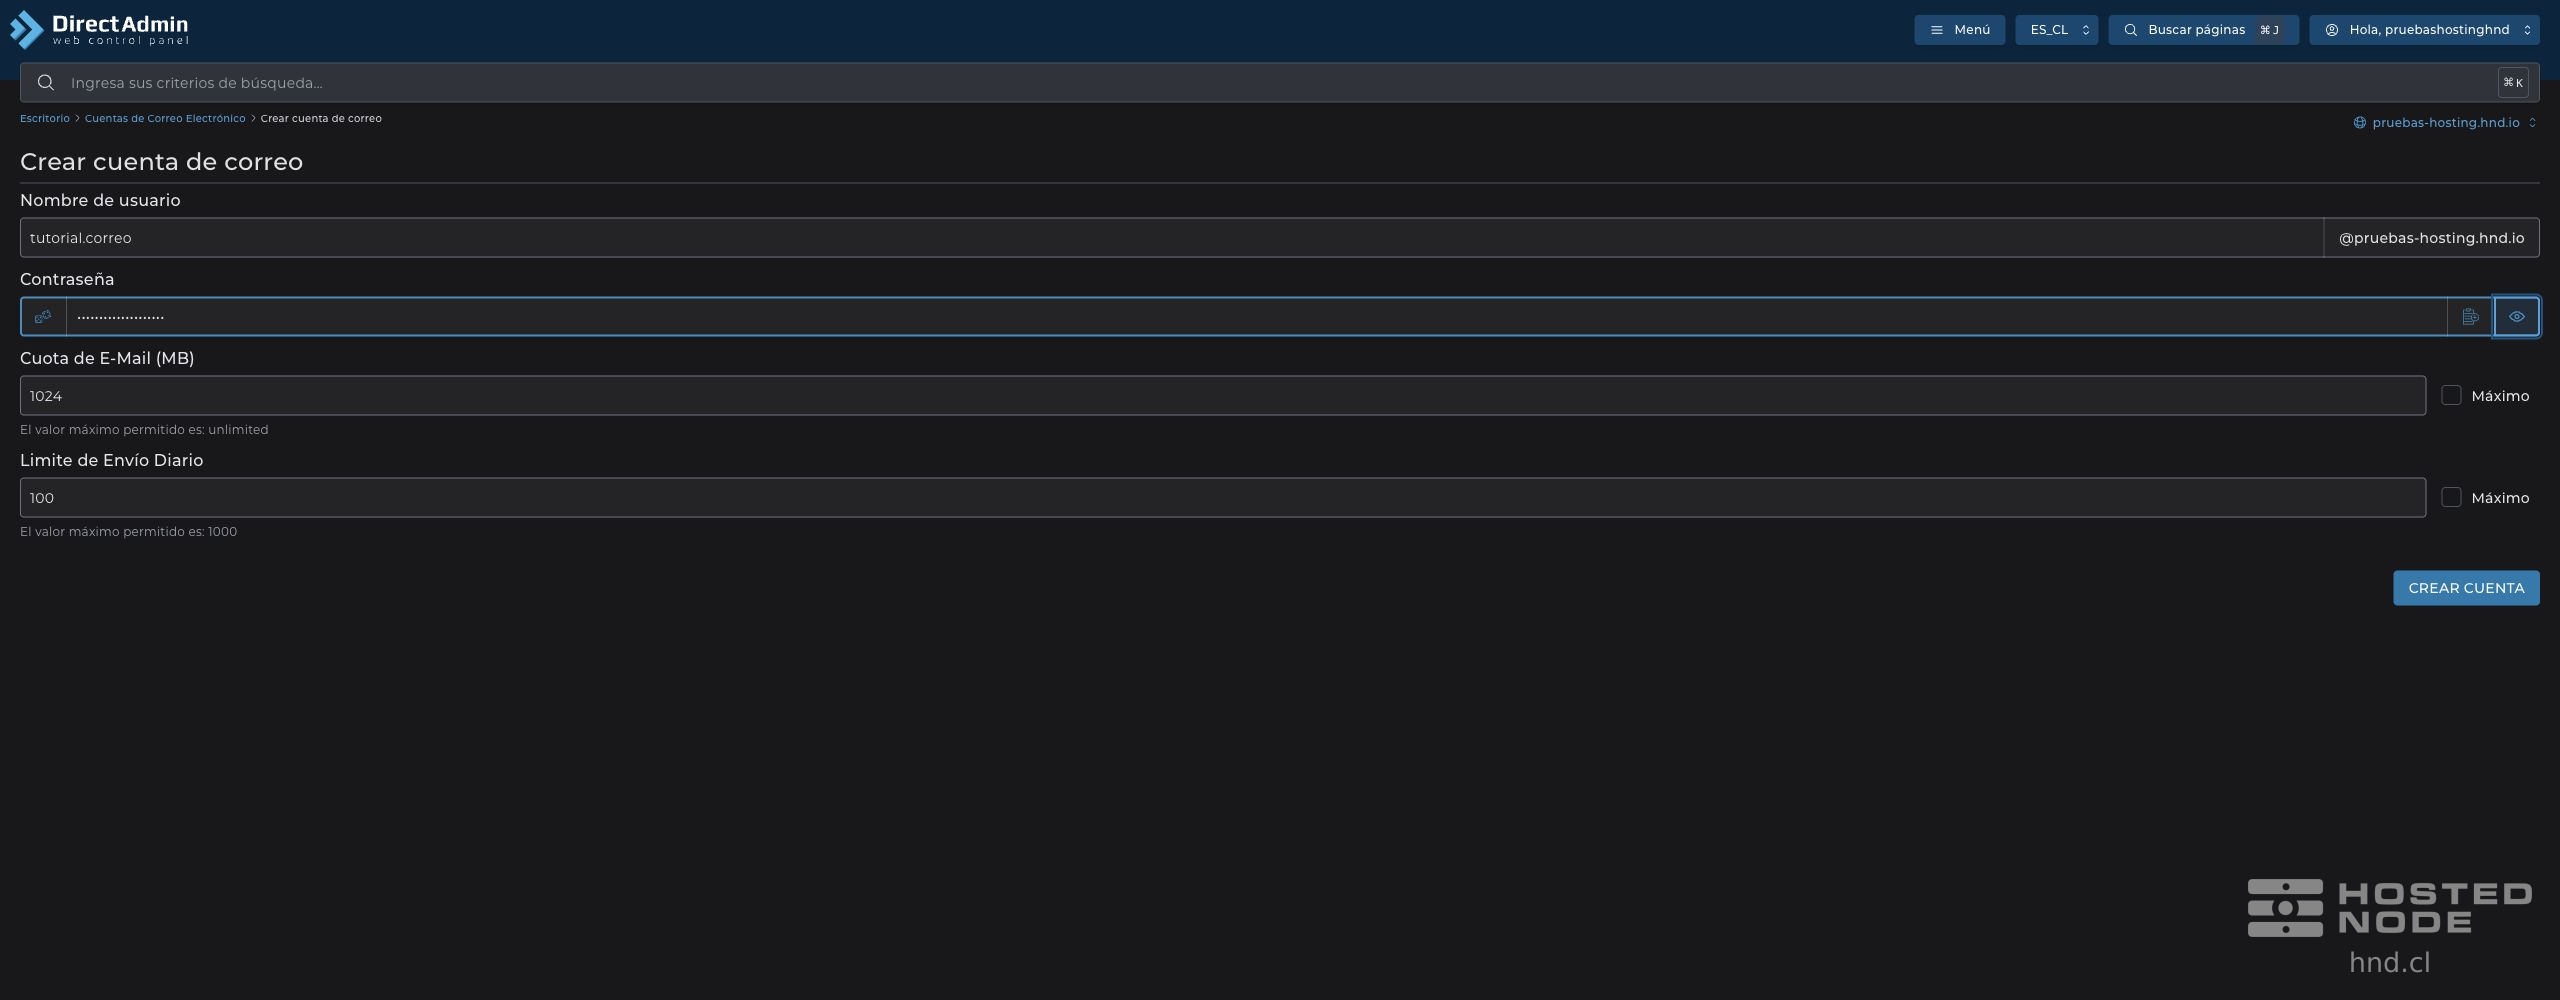
In Username, enter only the part before the at sign. For example, enter
contactoto create an address with that name on your domain.Check the suffix at the far right of the field. DirectAdmin adds
@and the selected domain; do not enter the full address in the username field.In Password, use a long, unique password that is difficult to guess. You can enter it yourself or use the Generate Random Password button at the beginning of the field.
Save the password in your password manager before continuing. If you use the generator and the password remains visible, click Hide before sharing your screen or taking a screenshot.
In the images, the name entered was tutorial.correo, so the resulting address was tutorial.correo@pruebas-hosting.hnd.io. Replace that name with the one you want to use on your own domain.
4. Set the quota and daily sending limit
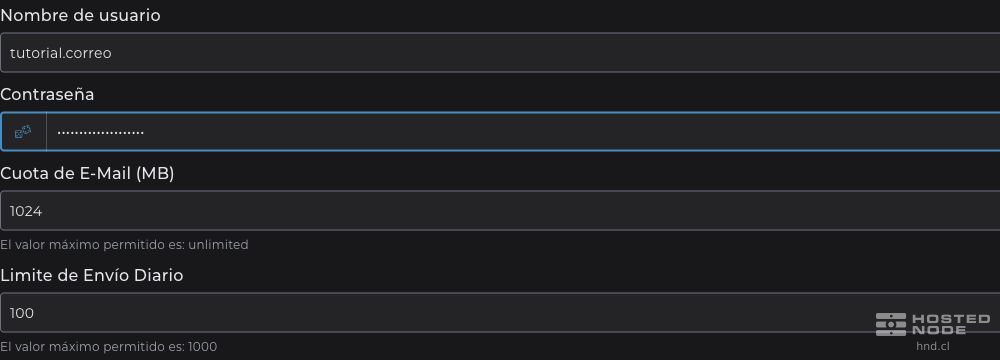
Field | What to enter |
|---|---|
E-mail Quota (MB) | This is the mailbox storage limit. The demonstration used |
Daily Send Limit | This limits the mailbox's daily sending. The example used |
Maximum and maximum allowed value | The form shows the authorized maximums and a Maximum checkbox for each field. Check what your own account allows. To reproduce the example, leave those boxes unchecked and enter the indicated values. |
For this account, the form showed unlimited as the maximum quota and 1000 as the maximum daily sending limit. These values do not describe all plans. An email quota without an individual maximum does not increase the total available hosting space.
If the daily limit initially appears as 0, do not assume what it means: to follow this procedure, enter a permitted positive value. If you need a different configuration, confirm your service terms with support.
5. Create the account and save its login details
Review the name, domain, password, and both limits.
Click Create Account at the bottom of the form just once.
Wait for the Account Created confirmation. If a validation message appears, correct the indicated field before trying again.
Review the private summary and save the necessary details in a secure place. Then click Close to return to the list.
6. Check the result
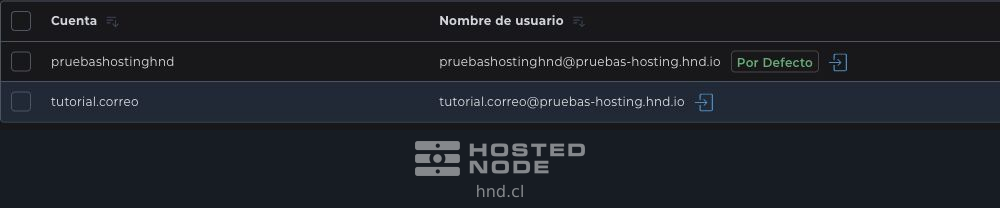
Locate the new row and check the full address, including the name and domain. The demonstration shows two accounts: the original and the newly created mailbox.
Also check the Usage and Sent columns in that same row. The example shows 0 B / 1 GB and 0 / 100, consistent with the values entered in the form.
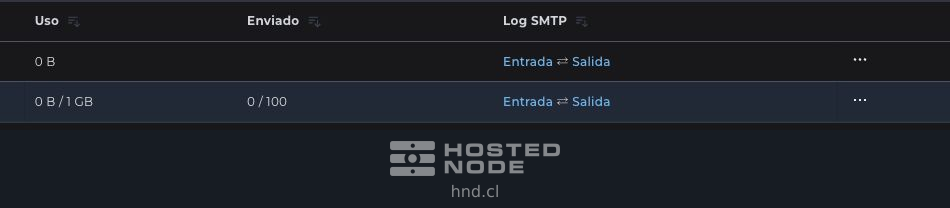
The presence of the account and its limits confirms that the mailbox has been created. Sending and receiving messages with other domains also requires the correct mail service and DNS configuration; creating the account alone does not verify message delivery.
Next steps with your new email account
Each account row includes a link labeled Access Webmail. You can also find Webmail: Roundcube under Additional Features on the dashboard. If you are prompted to log in to the mailbox, use its full email address and password.
To configure an email application, use the servers, ports, and encryption options appropriate for your service. Do not copy the server name or connection details from the screenshots as though they were universal.
When you have finished managing your hosting, open your user menu in the upper-right corner and select Log Out.
Common problems
Situation | What to check |
|---|---|
The domain is incorrect | Return to the list or dashboard, select the correct domain, and reopen Create Account before saving. |
The name already exists or is not accepted | Check the account list and the validation message. Enter only the name before the at sign, without spaces, or choose another available name. |
The password is rejected | Follow the requirements shown in the panel or use the generator. Store the new password securely. |
The quota or daily limit is rejected | Check the maximum values in the form and your hosting resources. Do not reuse values from another plan without verifying them. |
The account does not appear after saving | Check the active domain, the pages of the list, and any error messages. Check whether the account already exists before trying to create it again. |
The mailbox exists but does not receive email | Confirm which provider manages the domain's email and request a review of DNS, MX records, and capacity if necessary. Avoid changing records without knowing the current configuration. |
If you need help, provide support with the domain, the affected email address, and the error message, without including passwords.