

How to change the PHP version and settings in DirectAdmin
Change the PHP version and adjust memory_limit, post_max_size, max_execution_time, and upload_max_filesize from PHP Settings in DirectAdmin.
Use PHP Settings in DirectAdmin to choose your site's PHP version and adjust memory_limit, post_max_size, max_execution_time and upload_max_filesize from the panel.
What the version changes and what the parameters change
The PHP version determines which version of the interpreter runs your site's code. Choose one that is compatible with your application and its plugins. The PHP parameters set memory, size, and execution time limits; their values must match your application's requirements and what your service allows.
Before you begin
Log in to DirectAdmin using your hosting details and select the domain you want to manage.
Check which version and values your application needs.
Note the current version and parameters so you can restore those values if you need to undo a change.
Before changing the version on a live site, have an up-to-date backup of its files and database available.
1. Open PHP Settings
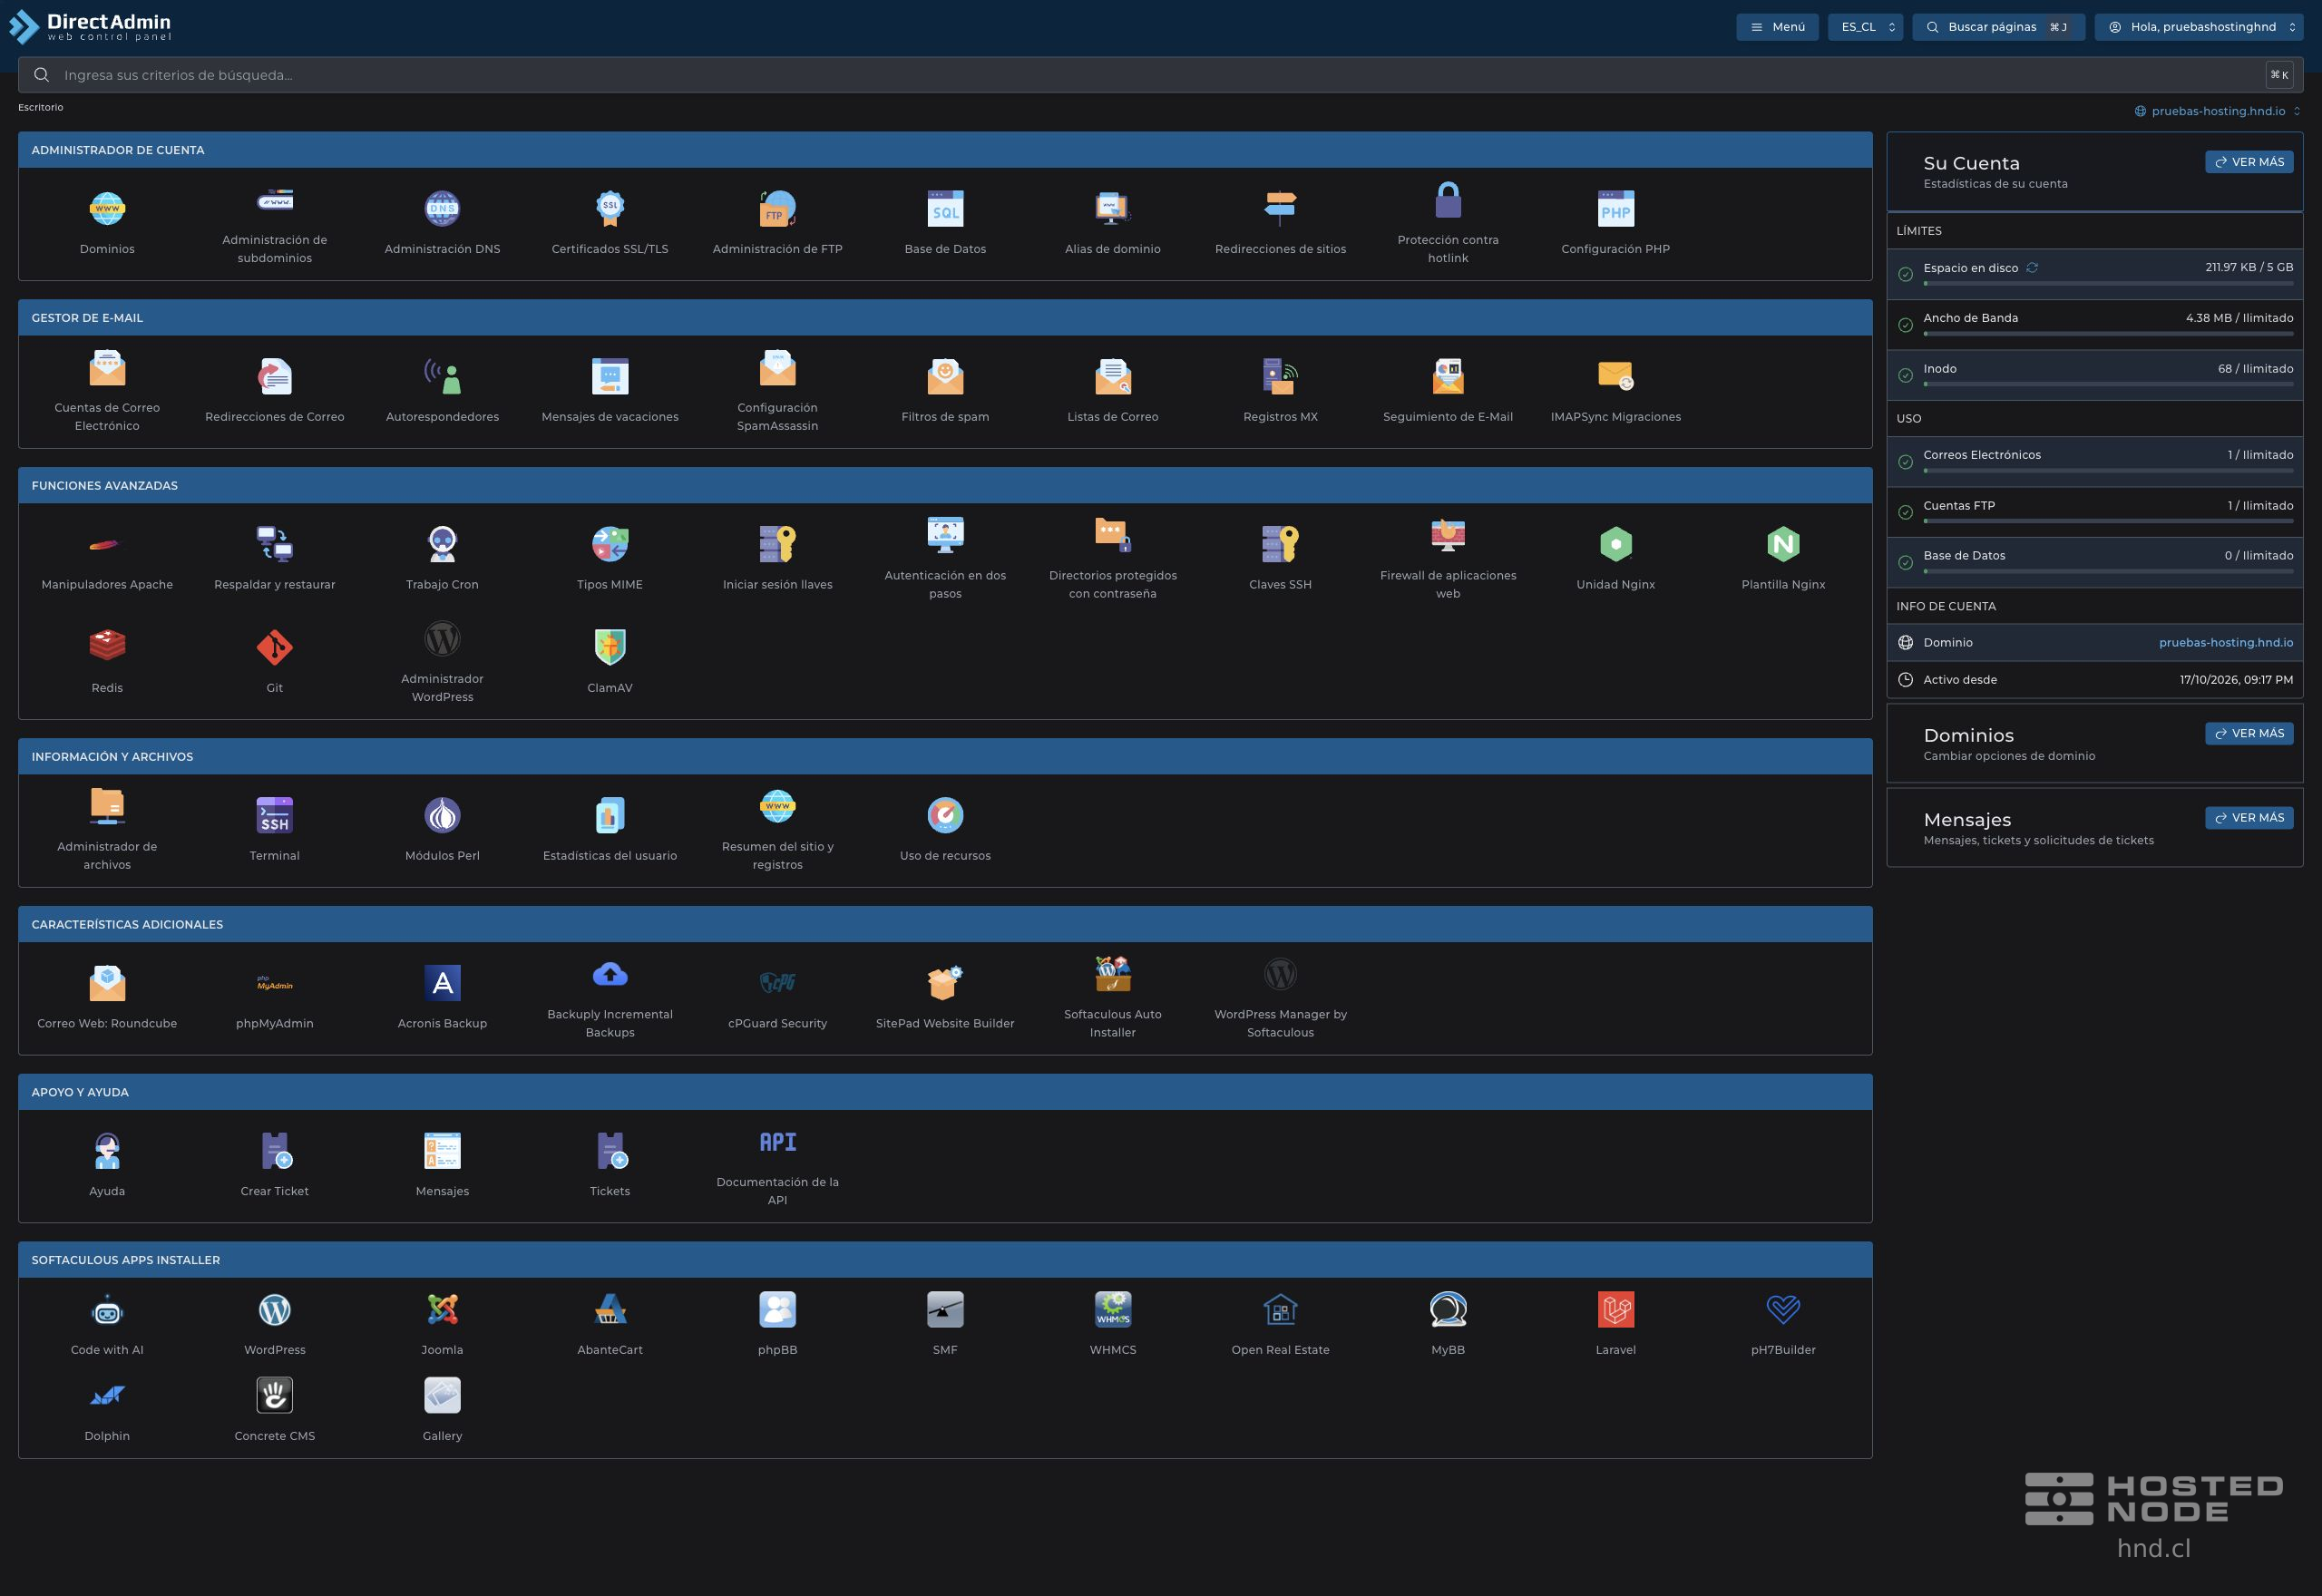
On the DirectAdmin dashboard, find Account Manager and click PHP Settings.
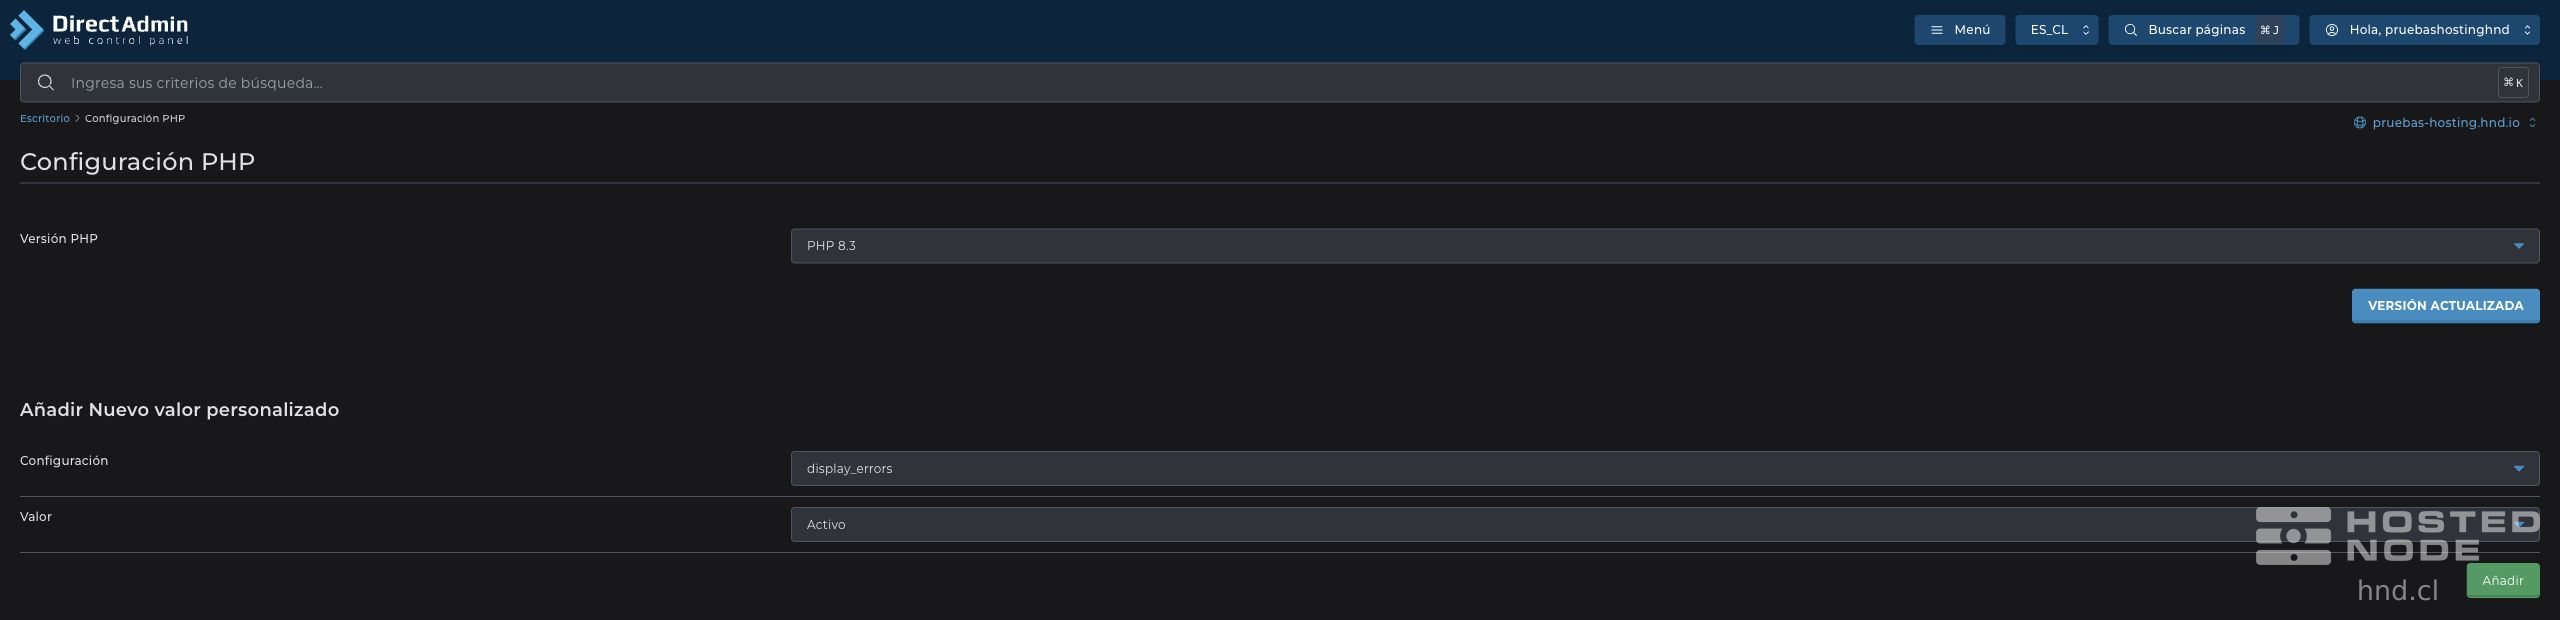
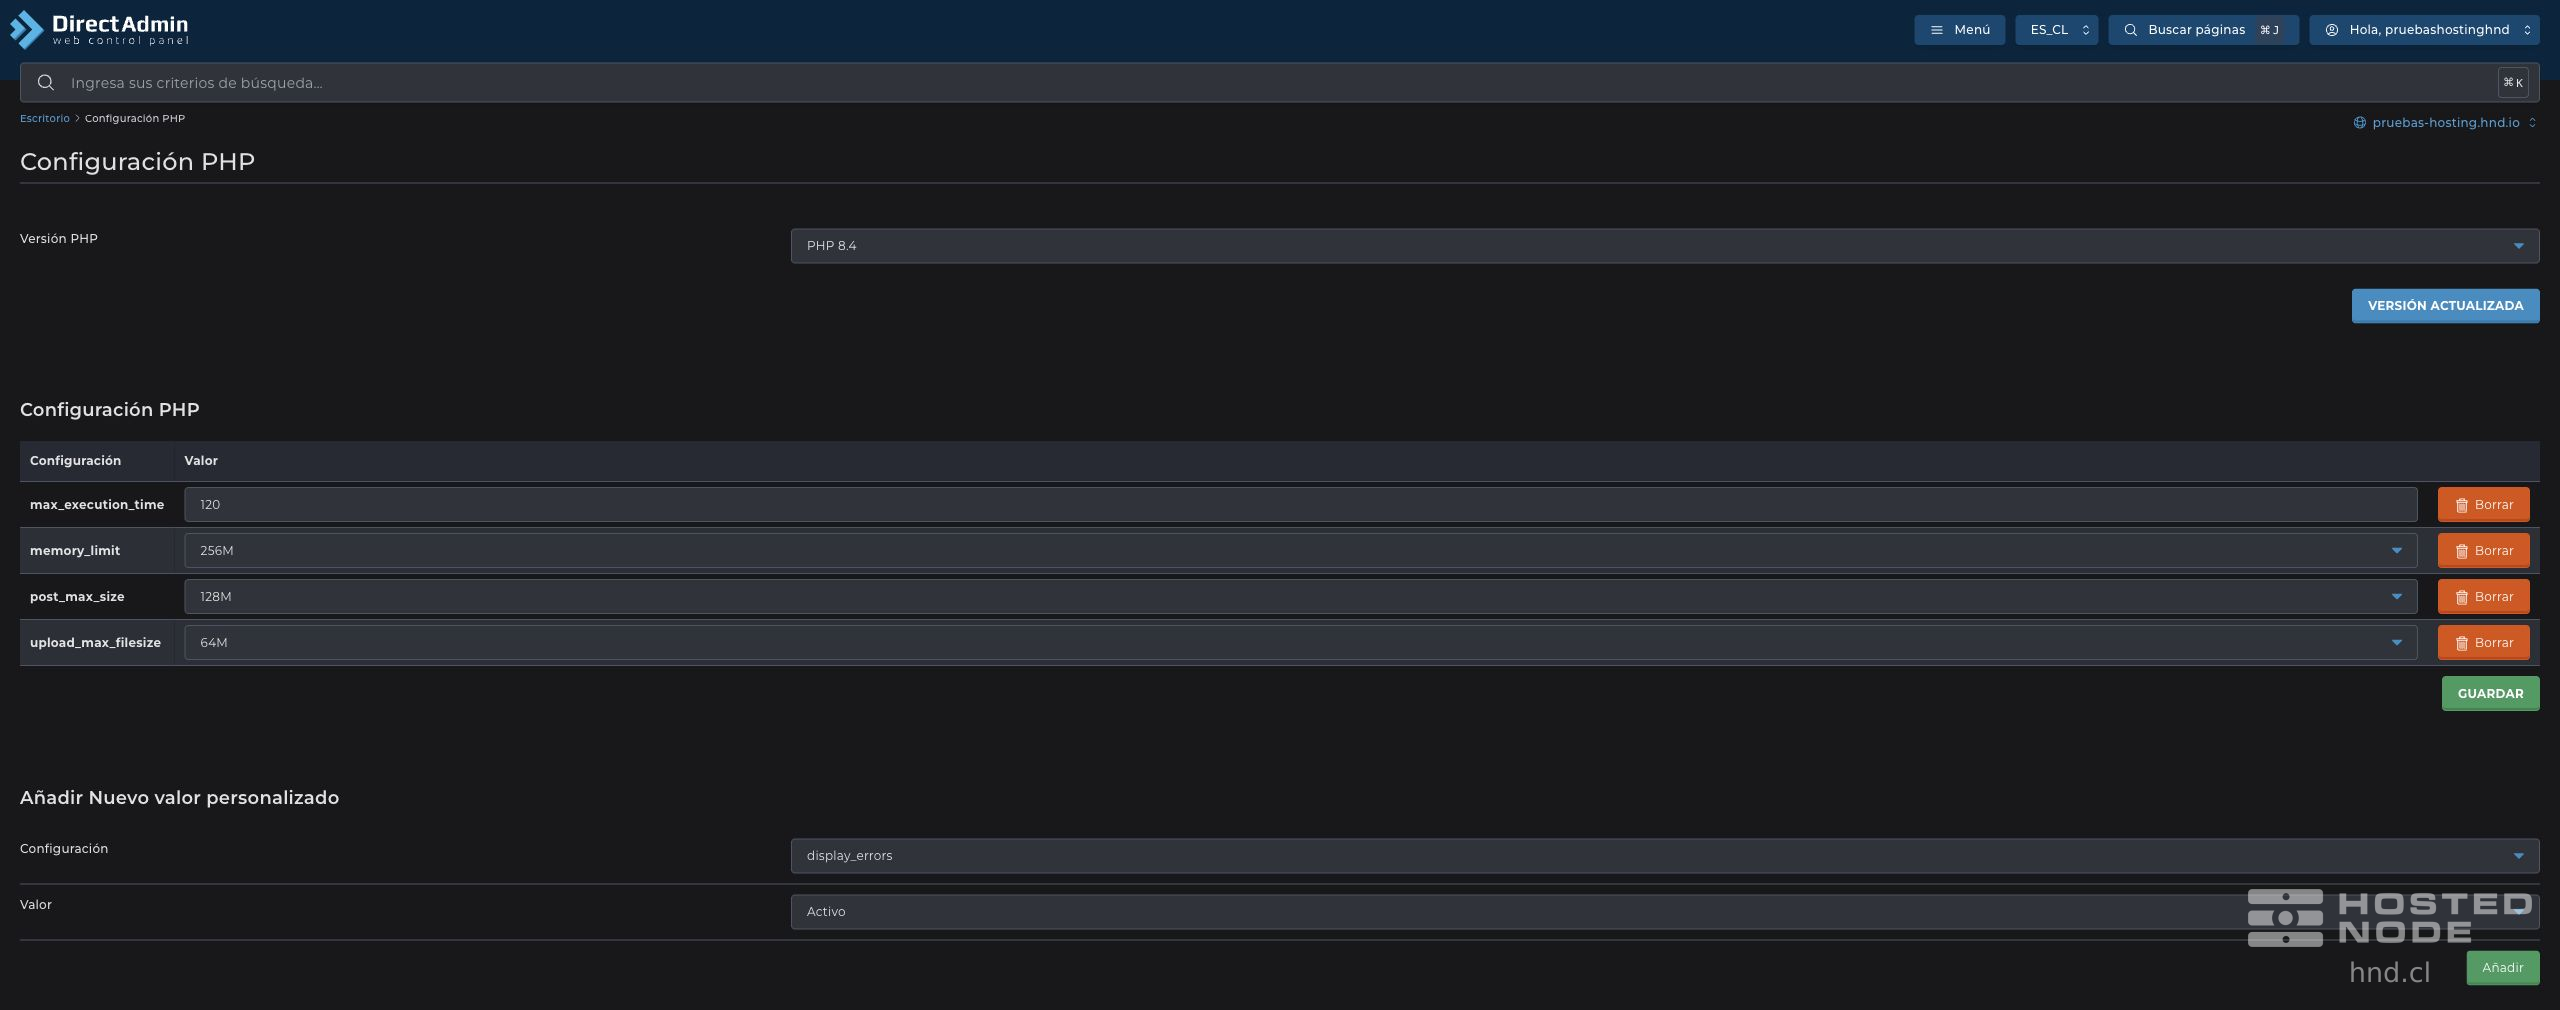
At the top, you will find the PHP Version selector. Below it are the custom parameters table, if any exist, and the Add New Custom Value form.
2. Change the PHP version
Open the PHP Version selector.
Select the version compatible with your application.
Click Update Version below the selector.
Wait for the confirmation PHP versions saved and reopen the section to check the selection.
Open the site and check that its pages, forms, and usual features still work.
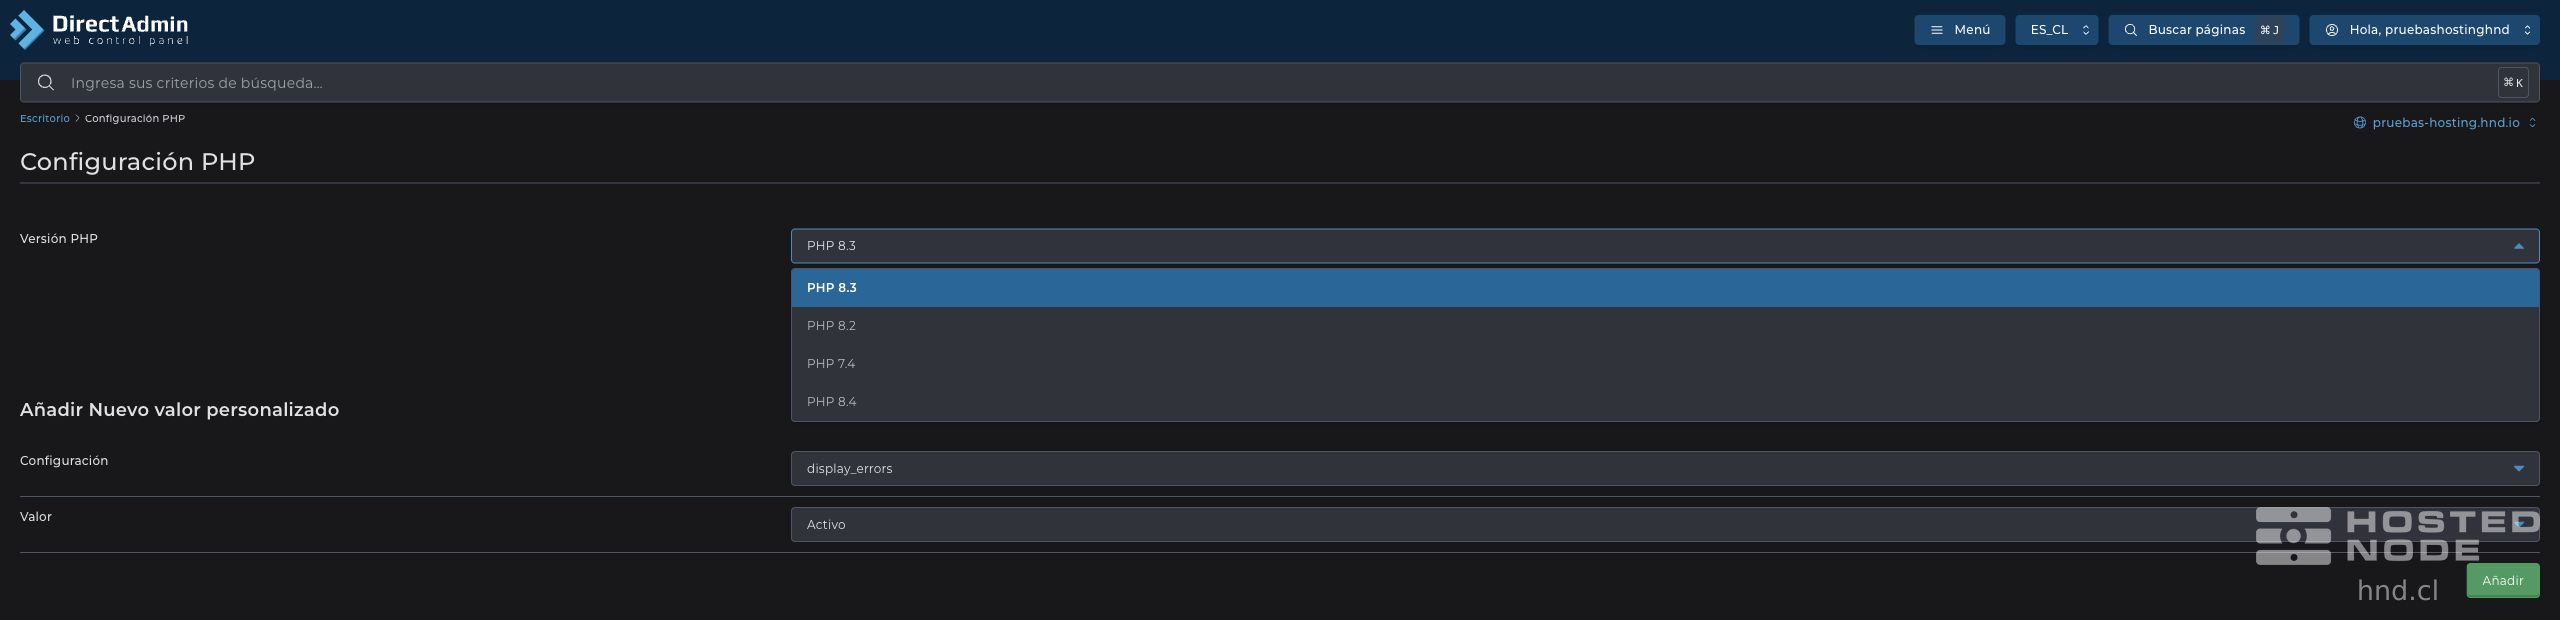
The list shows the versions available with your service. If the version you need is not listed, ask support about its availability.
3. Identify the parameter you need to adjust
Parameter | What it controls | Example value |
|---|---|---|
| Maximum memory a PHP script can use. |
|
| Maximum total size of a POST request, including files and other form fields. |
|
| Maximum execution time of a PHP script, expressed in seconds. |
|
| Maximum size of each file uploaded through PHP. |
|
The values in the table are examples. Use the values your application needs and your hosting allows. Sizes are expressed in the units offered by the panel, such as M or G; max_execution_time is entered as a number of seconds.
To allow an upload, post_max_size must be greater than upload_max_filesize, with room for the other form data. For example, you can use 128M for POST for a maximum of 64M per file.
4. Add a custom value
Under Add New Custom Value → Setting, select the parameter. Scroll within the list if necessary.
Under Value, choose or enter the value required by your application. For example, select
256Mformemory_limit.Click Add and wait for the confirmation Custom php.ini value added.
Check that the parameter appears in the table.
Repeat the procedure for the other parameters you need to adjust.
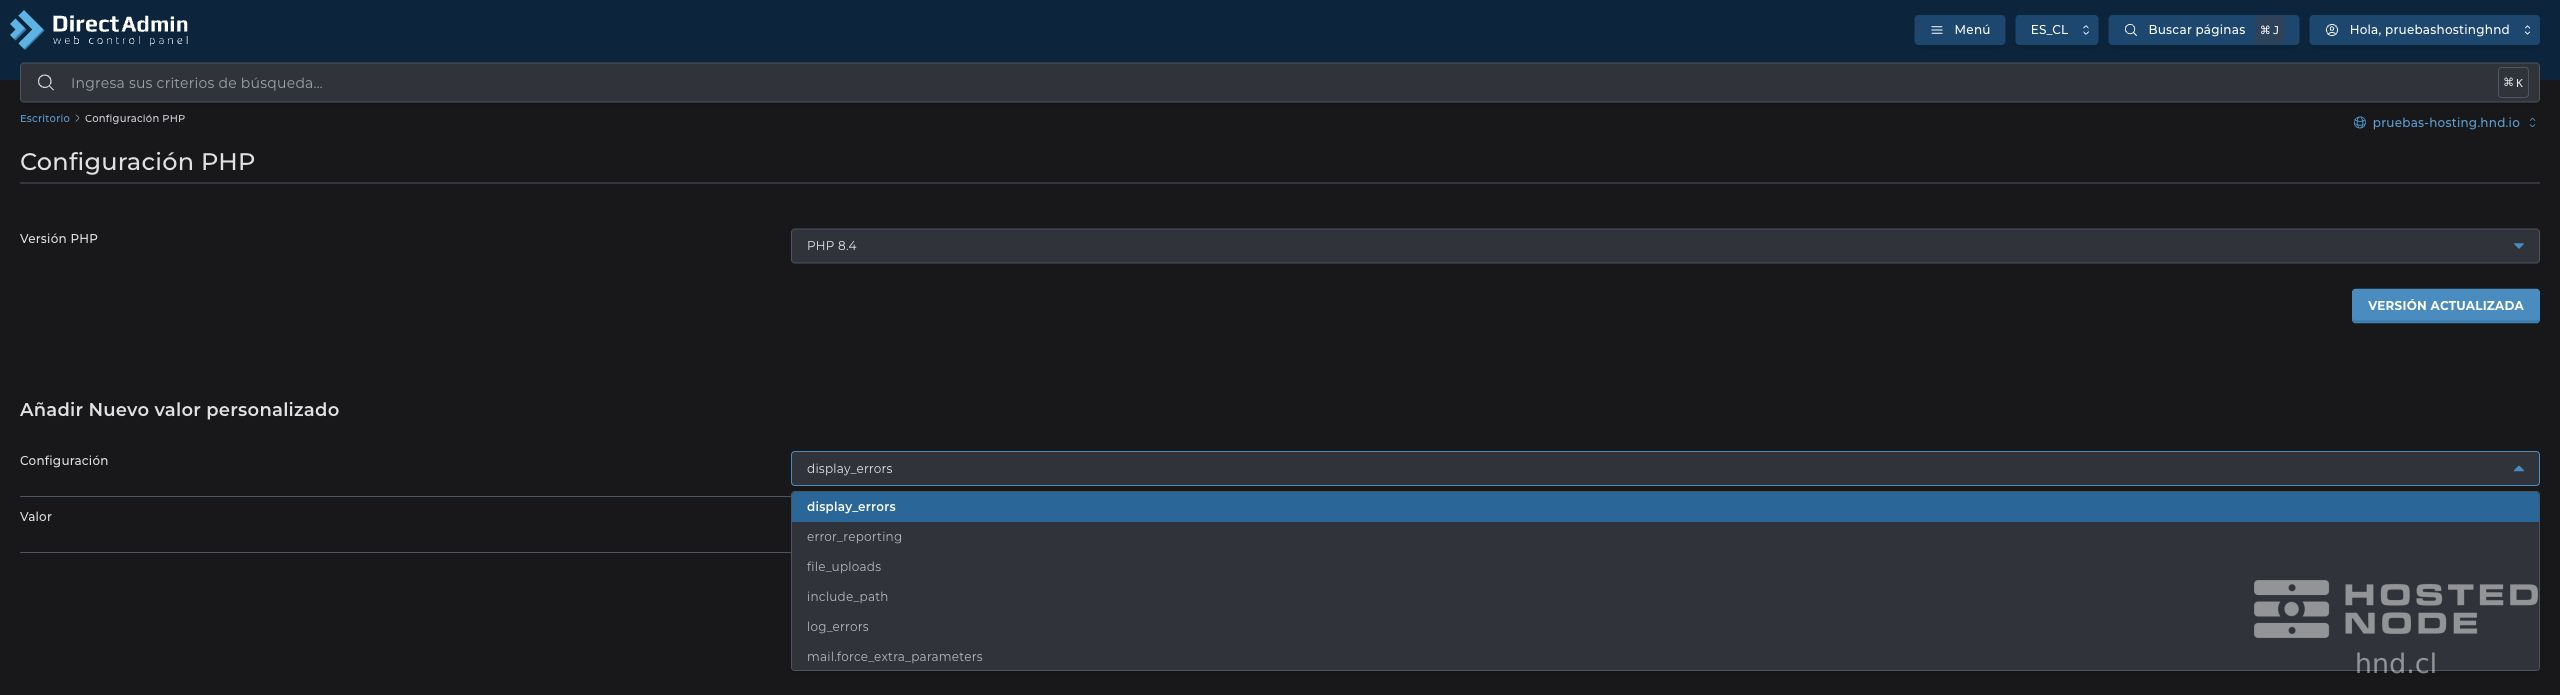
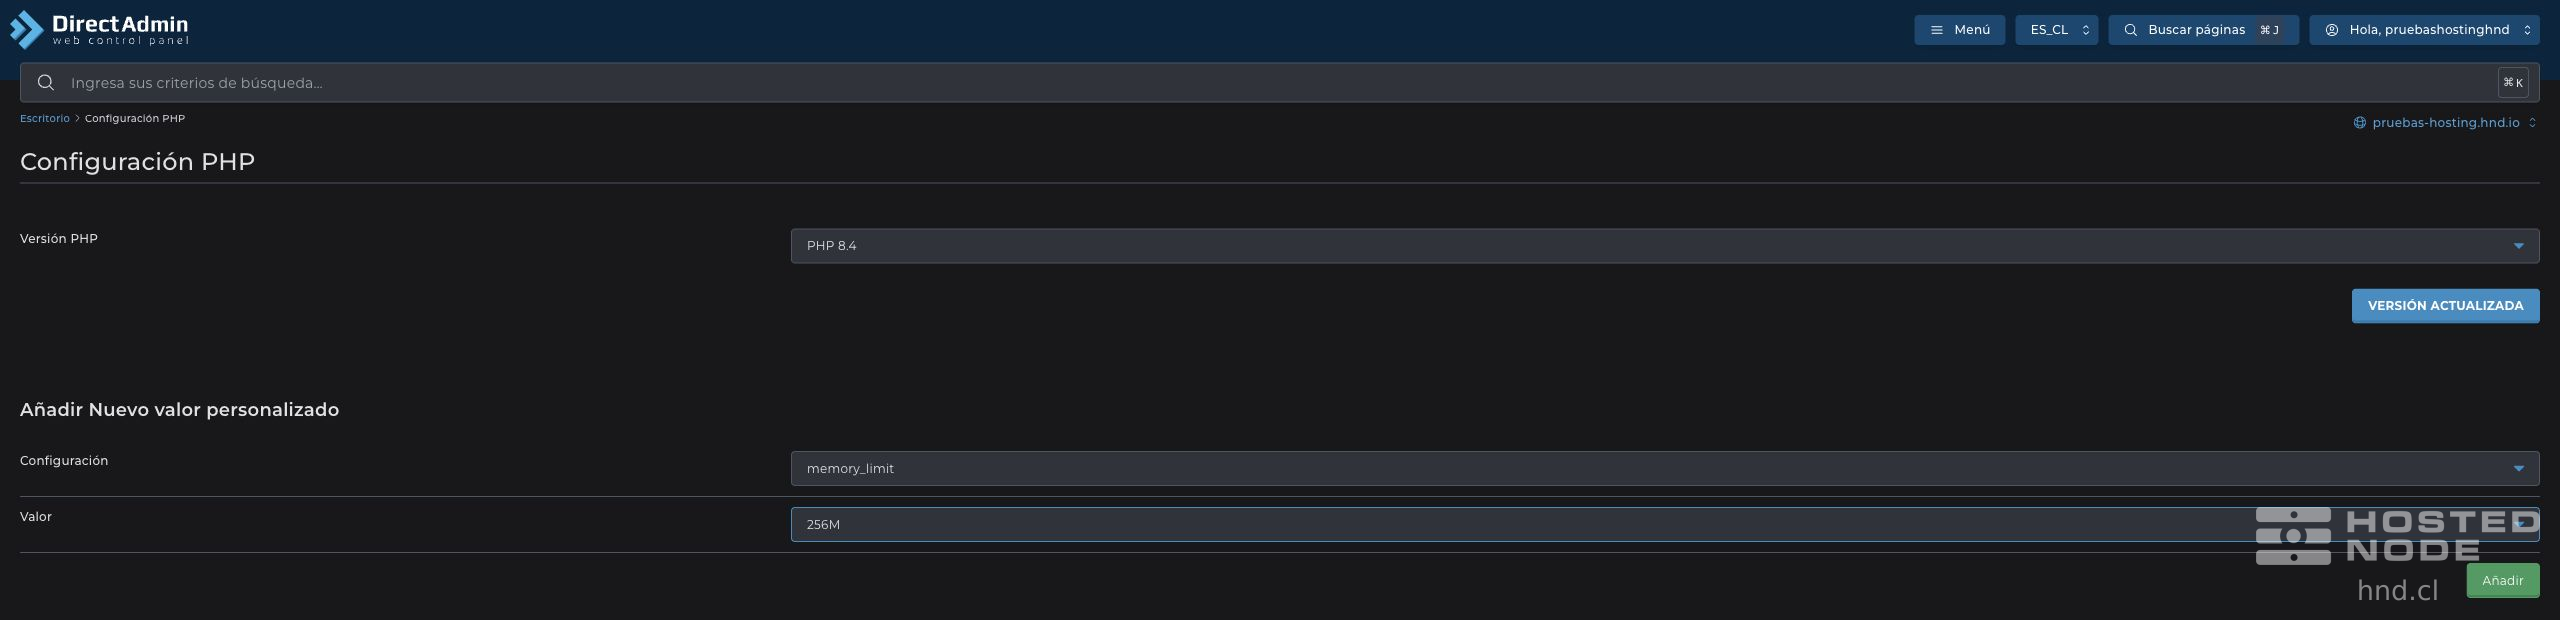
Add saves each new parameter. If the parameter is already listed in the table, edit its value in that row and click Save below the table.
5. Check the changes
Reopen PHP Settings and check that the saved version and values are the ones you chose.
If you changed parameters, wait up to 3 minutes for them to apply.
On the site, test the operation you needed the adjustment for, such as a file upload or a form.
Modify or remove a customization
To modify an existing parameter, change the value in its row and click Save. To remove a customization, click Delete in the corresponding row and check the panel's confirmation. Once it is removed, the site uses the value determined by the service configuration.
If you need to return to a previous PHP version, select it and click Update Version. To undo a parameter edit, enter the value you noted before the change and save.
If a notice or error appears
Situation | What to do |
|---|---|
The panel indicates that only the default domain can control the settings | Open the tool from that domain and confirm the scope of the adjustment before saving. Do not assume that the values will apply independently to each site. |
The value is rejected | Check the options and limits shown in the form and use a value allowed by the service. |
The site's behavior does not change immediately | Wait up to 3 minutes after saving. Then check the site again and review the error message if the problem persists. |
The site displays errors after changing the version | Revert to the previous version and review the compatibility requirements for the application and its plugins. |