
How to use ClamAV antivirus from DirectAdmin
Start a ClamAV scan from DirectAdmin, choose its scope, and check Messages for a summary of scanned files and detections.
ClamAV lets you request file scans from DirectAdmin. You can choose the home directory, domains, mail, or a specific path and view the scan and report screens.
Before you begin
Check that ClamAV is available with your service and choose the scope you need. A broad scan may take time and consume account resources. Do not start multiple identical scans while one is active.
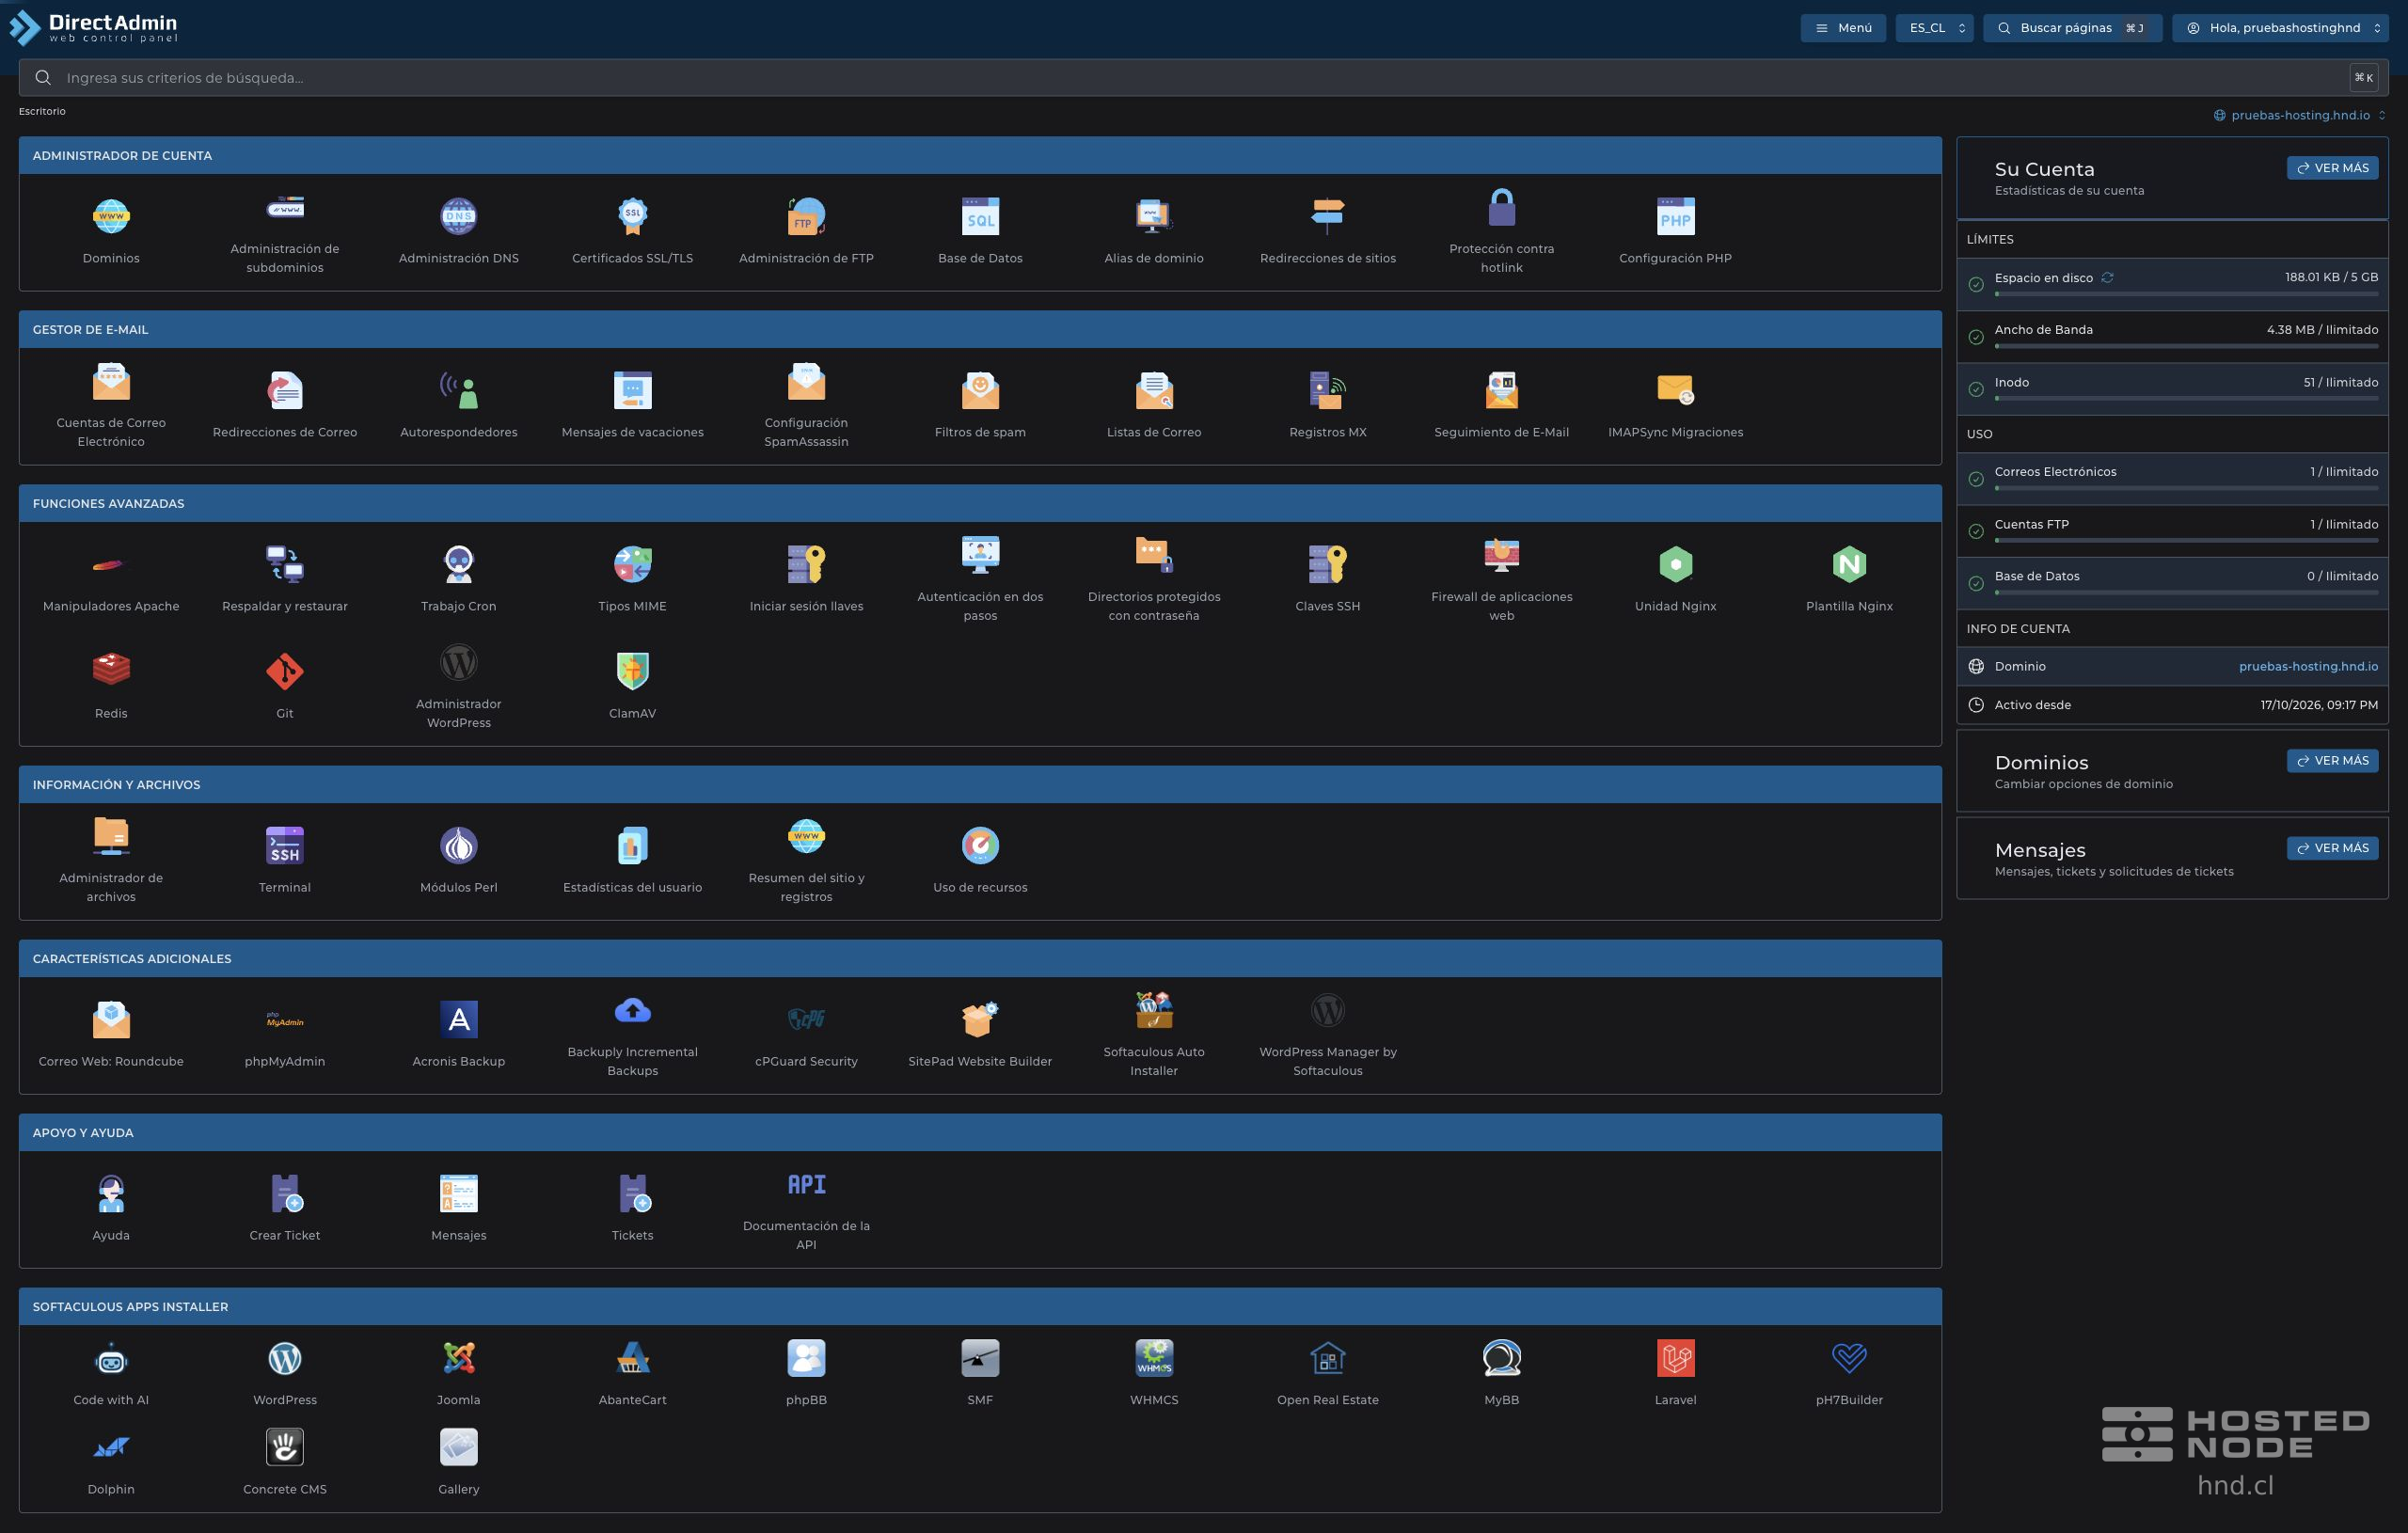
From the dashboard, open Advanced Features → ClamAV.
1. Select what to scan
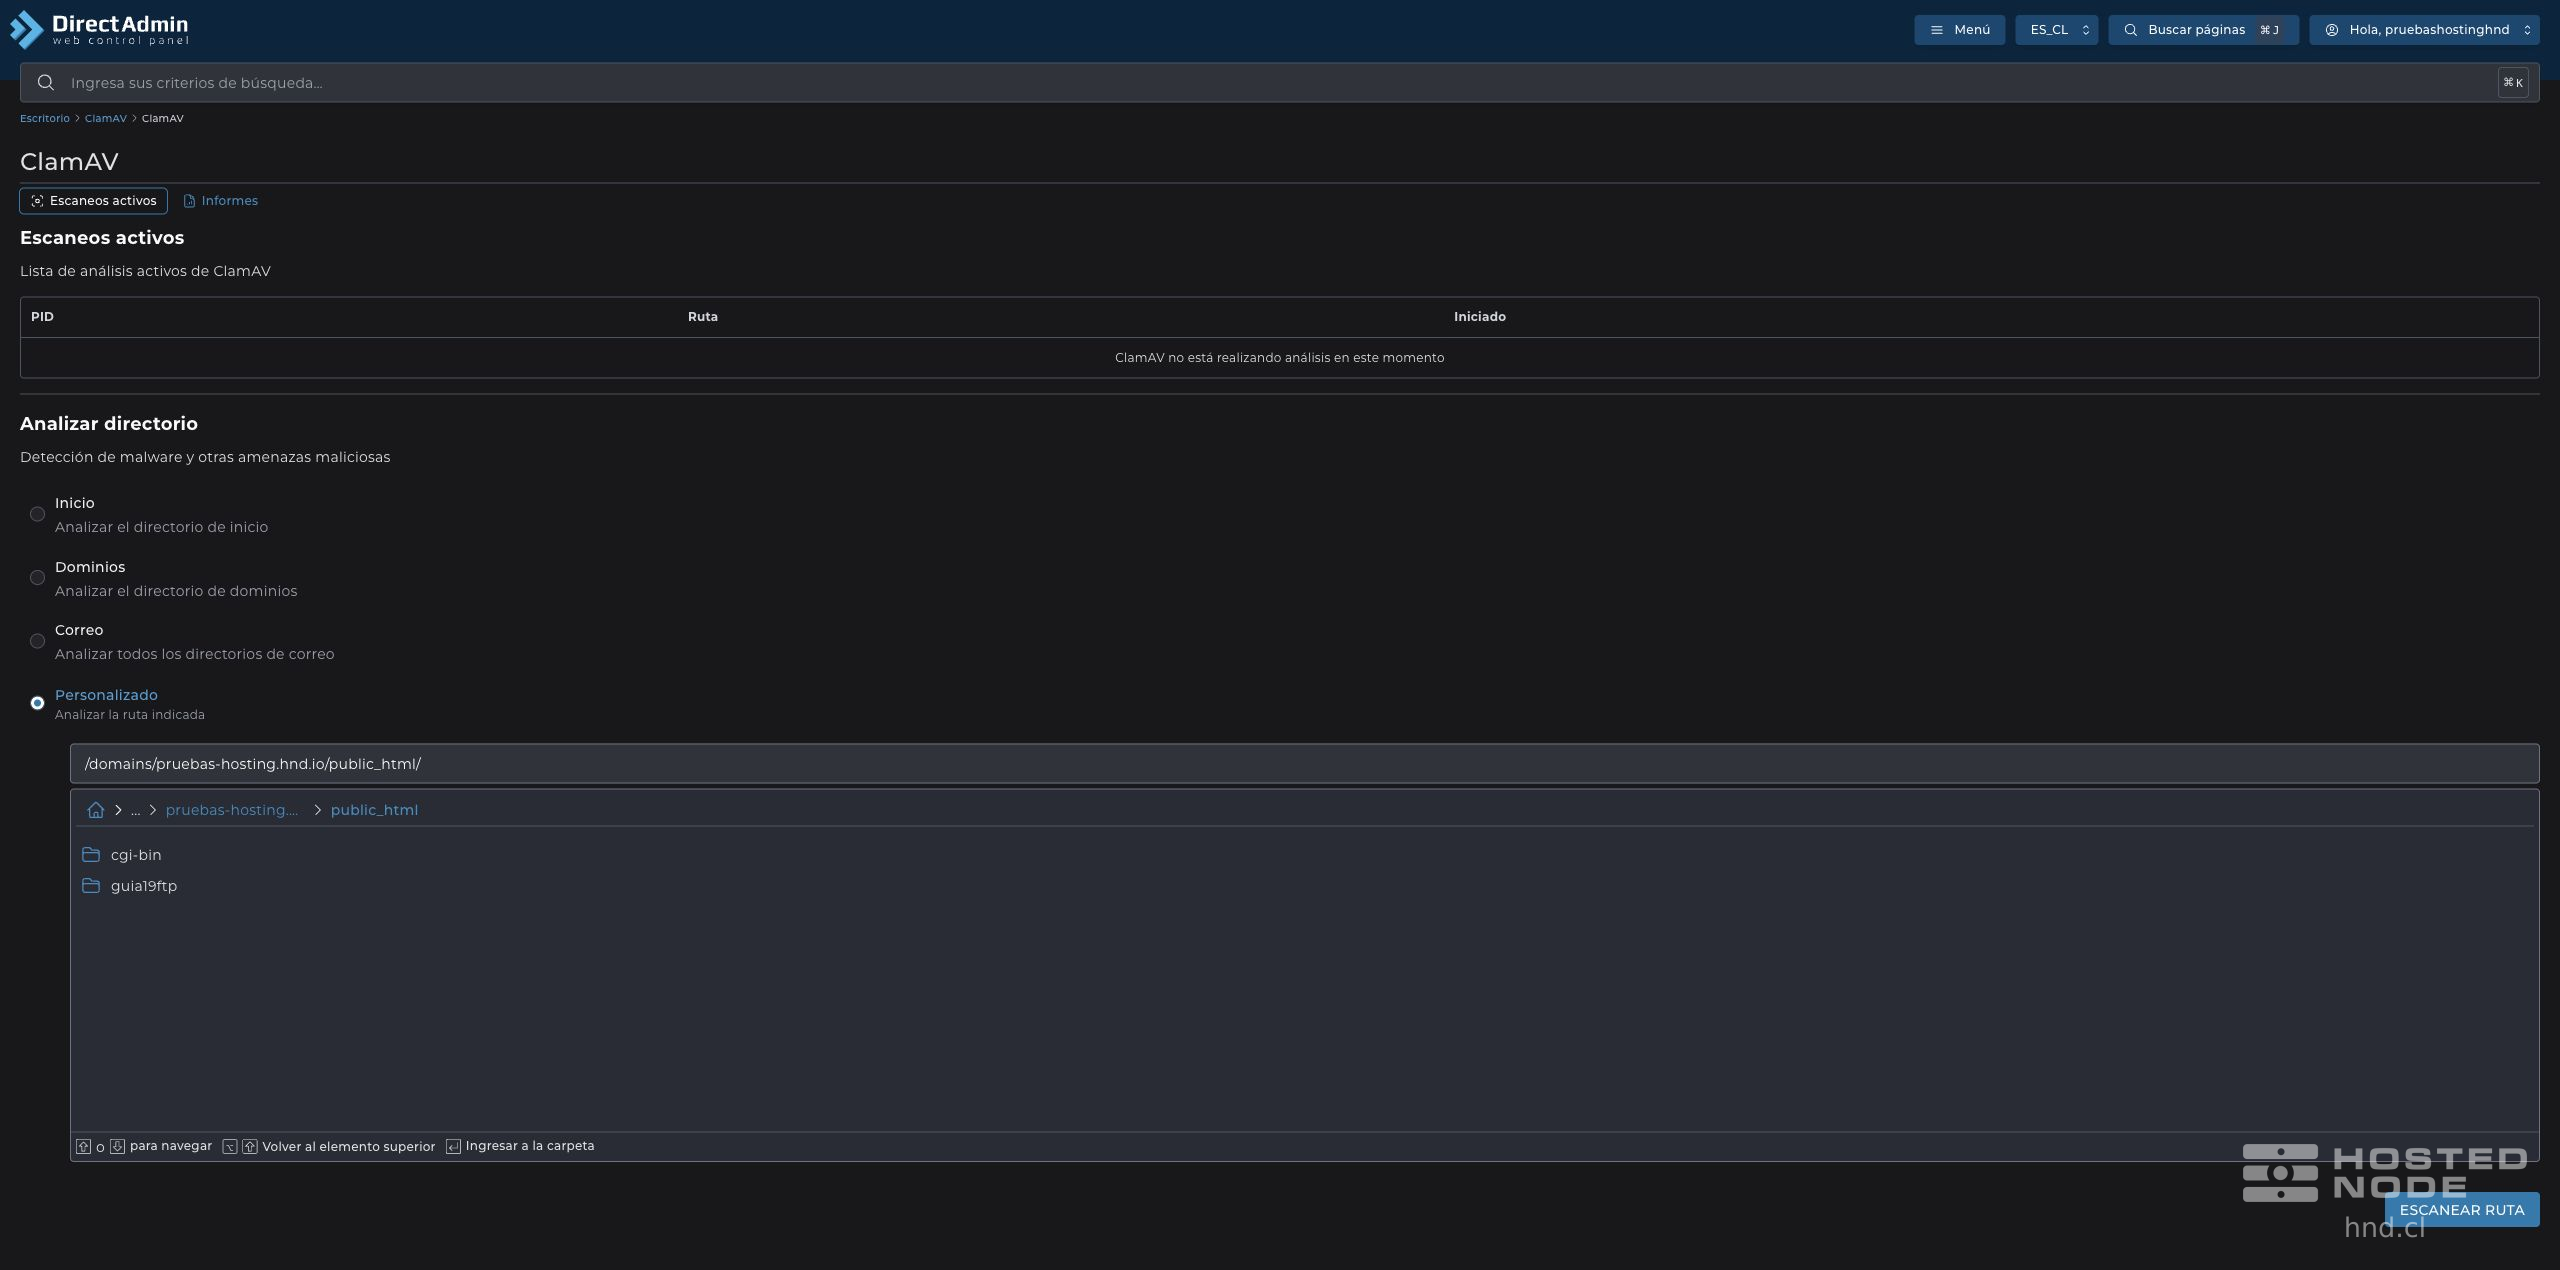
Under Scan directory, the panel offers these options:
Home: the account's home directory.
Domains: the domains directory.
Mail: the account's mail directories.
Custom: a specific path chosen in the selector.
To check a site's files, select Custom.
Use the selector to navigate to domains → your domain → public_html or the appropriate site folder.
Check the full path selected. In the selector,
/represents the scope of the account that the panel allows you to browse.
2. Request the scan
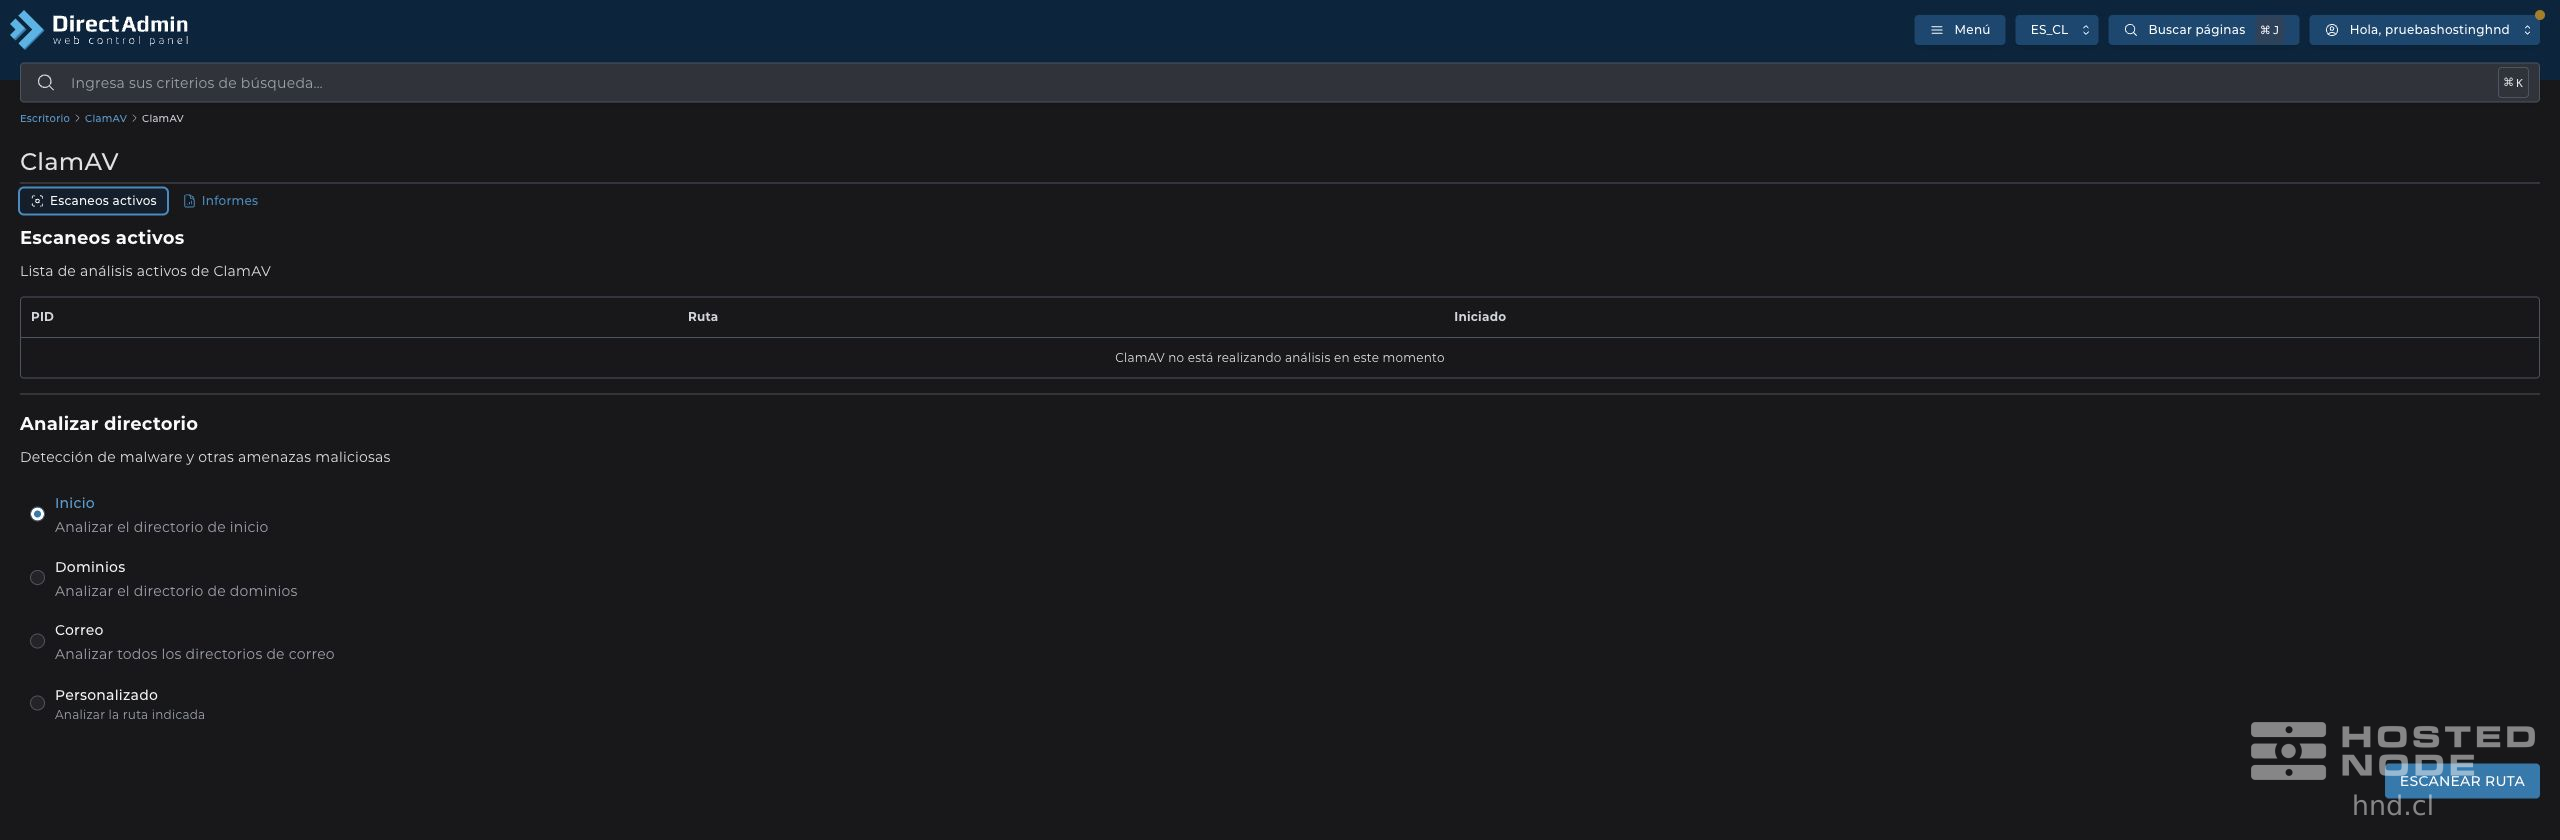
Click Scan path. The notification Directory scanning process started confirms that the panel accepted the request to start. It is not a detection result.
Under Active scans, check whether a PID, the Path and the start date appear. The duration depends on the files and available resources. If the scan is very brief, it may disappear before you return to this screen.
3. Check the result in Messages
When the scan finishes, open your user menu in the upper-right corner and select Messages. The panel may display a new notification count there.
Look for a subject beginning with ClamAV scan results and check that its path and date match the scan you requested.
Open the message to view SCAN SUMMARY.
Review Scanned directories, Scanned files, Infected files and the dates Start Date and End Date.
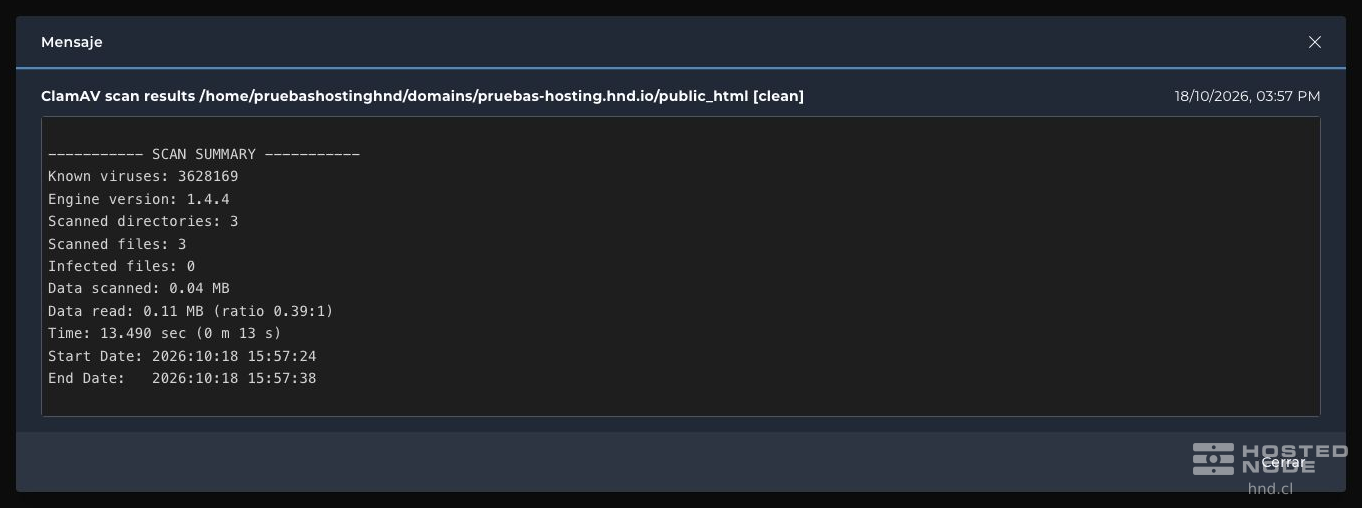
Scanned files indicates how many files were scanned. Infected files: 0 and a subject ending in [clean] indicate that the scan did not detect infected files among those checked. The end date lets you verify that the scan finished. A clean result does not guarantee that the entire site is secure or replace other checks.
The tool also has a Reports tab. If it remains empty, check Messages before concluding that the scan did not produce a result.

If a result identifies suspicious files, review the paths and the detection before taking action. Requesting a scan does not clean the files. Do not delete files the site needs based solely on a name; request a review if you cannot determine their function.