

How to Create a Subdomain in DirectAdmin
Create a subdomain in DirectAdmin, choose its document root, and verify the assigned name and folder from the control panel.
A subdomain lets you use a name such as blog.example.com within a domain you already manage. DirectAdmin lets you create it and choose the folder from which its files will be served.
Before you begin
Log in to DirectAdmin and select the domain the subdomain will belong to.
Check that your service allows you to add subdomains and choose a name that is not already in use.
If DNS is managed outside your hosting service, creating the subdomain in the panel does not replace the DNS record needed for the name to resolve.
1. Open Subdomain Management
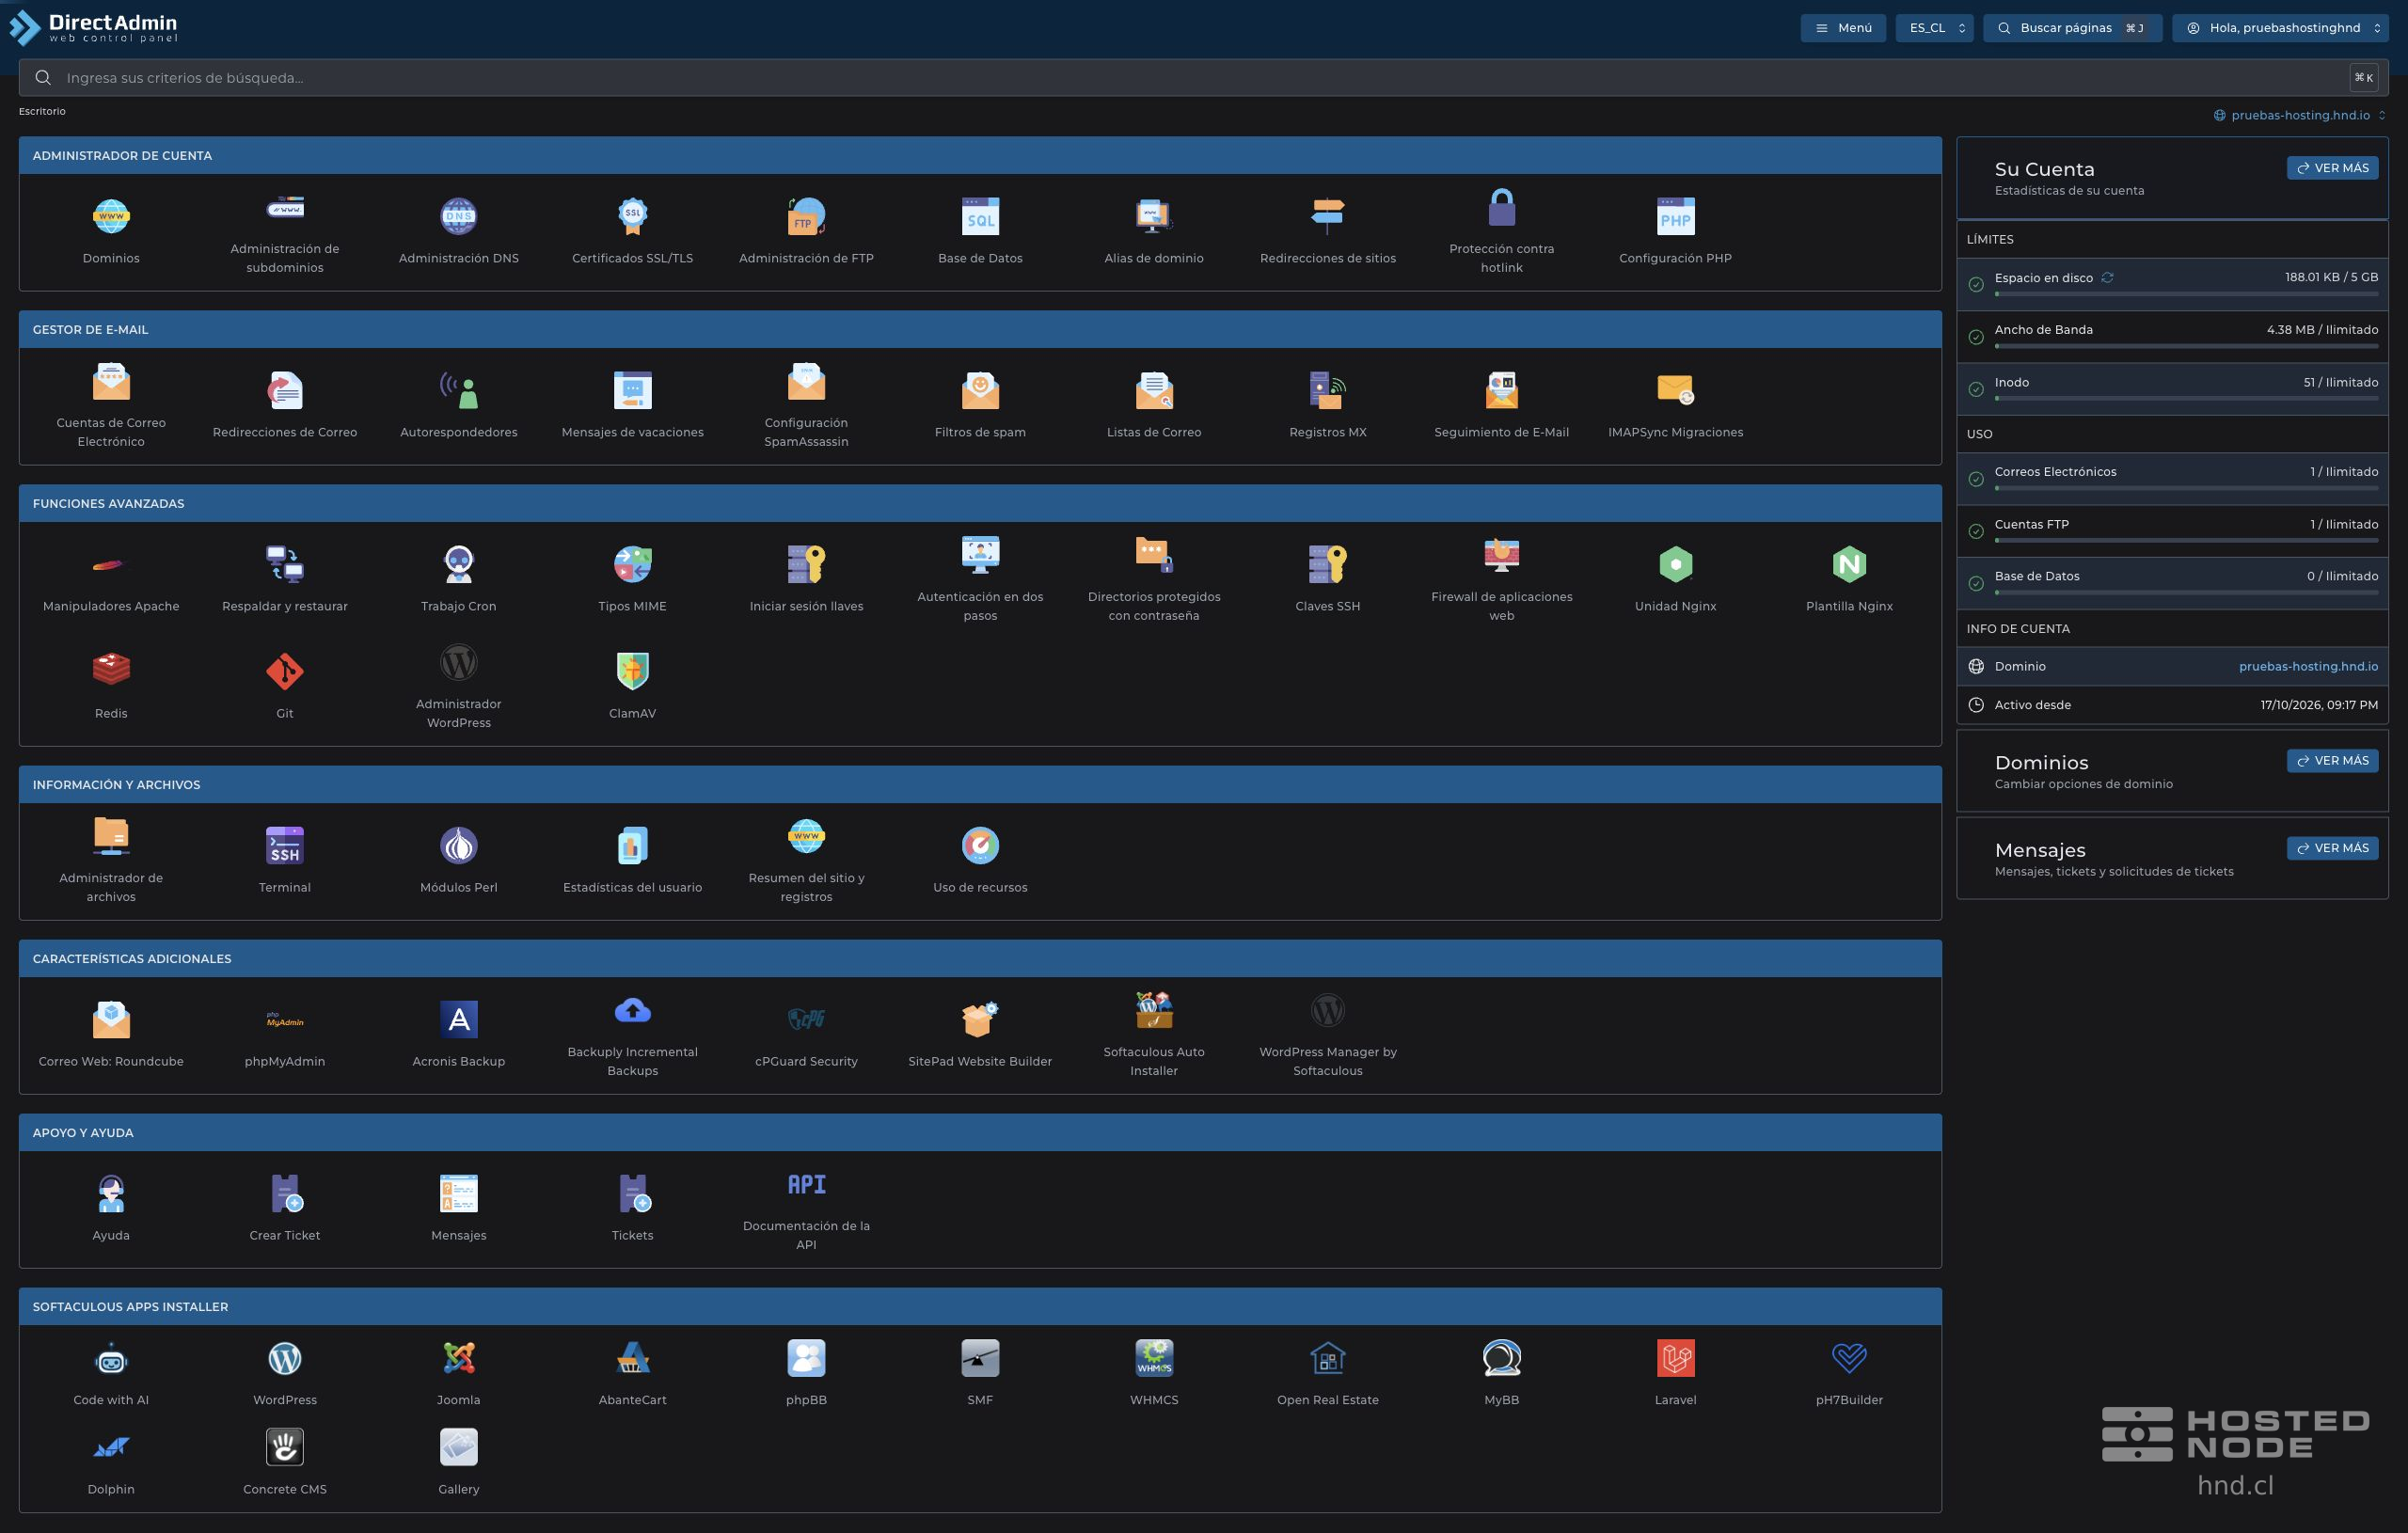
On the dashboard, open Account Manager → Subdomain Management. Click Add Subdomain.
2. Enter the name and choose the root
In Subdomain, enter only the part before the domain, for example
blog. The panel adds the selected domain.Review the full name and the Document Root options shown below.
Use Default if you want the separate location suggested by DirectAdmin.
Click Add Subdomain and wait for the confirmation Subdomain Created.
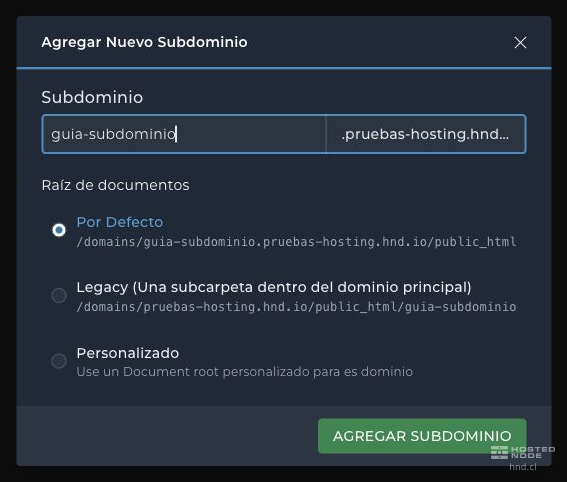
Default uses a dedicated folder for the subdomain. Legacy places its files in a subfolder of public_html for the main domain. Custom lets you specify another location supported by the panel. Review the displayed path before deciding: the root determines which files will be published under that name.
3. Check the result

In the list, check the full name, the Document Root and the PHP Version. The new row confirms that the panel created the subdomain; you still need content in its folder and correct DNS settings to access it from a browser.
If the name does not appear, check the active domain and any validation messages before trying to create it again. If the browser cannot find the site, check that the subdomain's DNS points to your hosting service and wait for the DNS caches to update.